Sunday, 23 March 2014

It's nearly Mother's Day....

I've suddenly realised that next Sunday is Mother's Day here in the UK and that I'd better get a wriggle on with my card making for it so today my make is the first of my cards - this one will be for my Godmother.   I was inspired by the colours at ColorQ this week http://colourq.blogspot.co.uk/2014/03/colourq-challenge-233.html


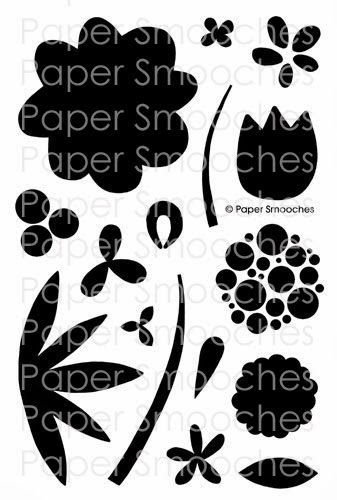
I started with the gorgeous new Spring Wreath Die from Wplus9 but I wanted the flowers I put on it to be more of a statement that the little blooms that come with the die so I added flowers using Papersmooches Flowers Dies.   To give some texture and a rich feel to the card I die cut all my elements from felt.  The sentiment in the centre is also from Wplus9 - the little Mother's Day Bouquet set which I stamped using the awesome new inks from Avery Elle - this one is Fog - a warm mid-grey.   After stamping the sentiment, I ran the panel through a woodgrain folder for more texture before adding the wreath and flowers and accenting them all with a tiny pearl centre.

The challenge at Papersmooches this week is Anything Goes so I'm linking up to their challenge too http://papersmoochessparks.blogspot.co.uk/2014/03/march-16-22-anything-goes-wk3-challenge.html


Saturday, 22 March 2014

Waltzingmouse Gift Cards

It's time for another challenge at Waltzingmouse Fanatics today and this fortnight we're playing with a lovely collection of soft blues and yellow - perfect for spring. I needed to make a gift card for my Mother's birthday for next month and I thought this would be the perfect challenge for it and this is what I came up with.


I used the lovely lace image from French Country, stamped in teal and then coloured in with copics - I love colouring patterns like this.  I then stamped a couple of sentiments - one from Gift Card It and one from Frame It to form a border above and below on the soft grey-pearl card base.

Then on the inside, I made the actual gift card itself using the Gift Card It Die set with some yellow DP and soft blue inks stamping more parts of the Gift Card It stamp set.  We get Mum a magazine subscription each year so this is the perfect way to give her something tangible to open on the day itself.


Hope that's inspired you to play along - numbers were low last challenge and we'd really like to get them up a bit again......

Thursday, 20 March 2014

Weight Watchers....

It was my best friend's birthday last Friday and one of the things that brought us together over 22 years ago now (eek!) was going to Weight Watchers together so when I saw this Art Impressions stamp last year I knew I had to have it and it's been waiting for it's first inking for this birthday in particular!


I used my favourite colouring technique of the moment which is watercolour painting with distress markers and then did a little die cutting and layering of some DP and glitter papers.

I'm going to enter it to the current Art Impressions Challenge http://artimpressionsstamps.blogspot.co.uk/2014/03/challenge-131-take-peek-mini-front-back.html  and the Seize the Birthday challenge (minus the toppings) http://seizethebirthday.blogspot.co.uk/2014/03/birthday-stitches.html


Sunday, 16 March 2014

Cats

I've been playing with cat stamps this weekend over at Make the Day Special as we got the new sets from Newton Nook that have been MIA for a few weeks at Heathrow....

Firstly I decided to sit Newton on a spritz background using my new mask and new spritzing tool so he would fit this week's Less is More challenge. 


I stamped Newton and his presents onto various scraps of card and pieced him together and then popped him over the masking (which I have to say really makes your arm ache getting a good coverage with copics)  I finished with a sentiment from the same set - Newton's Birthday Bash.

Then I decided I wanted to play with both sets of stamps so I dug out Newton's Antics too and used stamping and masking direct onto kraft to create a little scene of a cat's perfect day which, for my cat at least, involves playing, eating and LOTS of sleeping!


I used polychromos pencils and this time gave Newton some tiger stripes in greys.  I've tried to colour him like my cat, but she's a calico and has too many colours to get it right!  I brightened it up with a few pops of pink - the two bits of card as the same but the photo is awful and they look like totally different shades!


Saturday, 15 March 2014

Love You Always

Super quick post today while I'm waiting for the bath to run as we're off to our favourite Turkish restaurant tonight to celebrate my best mates birthday but I wanted to squeeze in my take on the Waltzingmouse PJ Party Bedtime Sketch.


I kept it really simple - I took inspiration from the DP I selected which has a nice texture which led me to the wood grain heart from "My Heart".  I stamped the leaf border over it following the sketch using wet cement shadow ink and added a strip of red spotty paper from the same pad (prima bohemian bamboo) to finish the sketch shape.  Then I overstamped the heart using pale tomato shadow ink and added the sentiment to match from the same set.   I think it has a masculine feel - romantic but not too mushy - so will go to my hubby.


You've still got a couple of days to play along with this cute sketch http://waltzingmouse.blogspot.co.uk/2014/03/march-pajama-party.html


Friday, 14 March 2014

Musing on Roots

I was really drawn to this week's MUSE card http://musecardclub.blogspot.co.uk/2014/03/muse-challenge-58.html as I love the new wooden paper I got recently and wanted to play with it some more.  I also wanted to play withe CASology's cue word of "roots" http://casology.blogspot.co.uk/2014/03/week-86-roots.html so I decided to do a play on wood and use a tree...


The tree is a memory box die cut from the wood, coloured with copics and then glued back into place to give a one layer finish.  I added a teeny bit of shimmer to some leaves with a wink of stella brush pen and then stamped a PTI sentiment over the top.  To add a little balance I added a couple of strips of DP (Lawn Fawn into the woods) to the right.


Monday, 10 March 2014

Veg and Flowers

It's Waltzingmouse Pajama Party night/day again and this month I actually managed 2 of the 3 challenges - I'll be back to try the bedtime sketch when I see it too.  http://waltzingmouse.blogspot.co.uk/

Firstly I had a go at "what would your mother make", now at first this stumped me as my mother is not really crafty - she can sew but only really did it practically (turning up trousers etc) and I don't have any stamps to match that!  Then I had a brain wave as the one thing she does love is gardening so I thought she would make little seed packets to share around the bounty from her garden so I made this.


I cut the packet on my cameo and then stamped in black and did a little pencil colouring to the cauliflower - quick and simple.

For the next challenge I got to play with my new funky flower die cuts for the die cut challenge.


I had some gorgeous cherry wood veneer paper I had yet to play with so I decided to do a one layer die cut floral arrangement.  Starting with the front flower first and working backwards I cut out all the pieces and then stamped them adding a little distress ink colour in neutral tones for that marquetry wood panelled feeling before piecing the jigsaw back together.  I added the sentiment over the top once I'd finished.

Are you all in your pjs and ready to party?  Can't wait to see what else everyone came up with.


Sunday, 9 March 2014

Blingy Watercolour

It's may day again at Make the Day Special Stamp Store - wow the weekends sure seem to come around quick these days!


I was inspired by a couple of challenges - Virginia's new Watercolour challenge and Lawnscaping's bling so I combined the two.  I used the "smush the distress ink pad into the craft mat" technique for my watercolouring once I'd embossed my blossoms and sentiment onto the watercolour card stock.  Super quick and easy technique.  I cut some faux buttoms from the remnants after die cutting the lable and finished with my bling in the form of gems, sequins and glitter.

http://lawnscaping.blogspot.co.uk/2014/03/lawnscaping-challenge-77-bling-it.html

http://virginiasviewchallenge.blogspot.co.uk/2014/03/virginias-view-challenge-1.html

Saturday, 8 March 2014

Stripes and Flowers

It's time for a new challenge at Waltzingmouse Fanatics and this time you don't have to make a card for a fella so hopefully you'll be less scared to play along!   We have a really simple sketch for you to play with so pop on over and check it out http://waltzingmousefanaticschallenge.blogspot.co.uk/

For my card I wanted to play with my new stash (well naturally lol!) so I decided to make my stripes from stamps from Gift Card It as the pretty stamps can be used for anything not just gift cards!


I started with the large frame and stamped just one long edge onto green card with a darker green ink just letting the curve fall off the edge.  I used the two leaf springs on the same green with the same ink and make a pattern for the bottom stripe.  For the centre stripe I opted for some yellow DP - I do love the effect of stamping over a soft pattern and this tiny yellow and white dots was perfect for this.  I stamped the floral bunch all over and then coloured with a couple of copics.  I stamped a sentiment from the same set in the same green ink on the white base card.

I finished with another new product - the lovely funky florals dies and die cut a couple of the flowers and leaves from green and yellow felt and stuck them together over the centre of the top border adding a blingy gem to finish.

We hope you're inspired to join us this week - can't wait to see what you do with the sketch http://waltzingmousefanaticschallenge.blogspot.co.uk/


Sunday, 2 March 2014

Focal Colours

I really don't seem to have too much time for crafting at the minute and I'm really not finding time to visit other blogs - sorry - hopefully I'll get into a better rhythm soon.  Today I'm sharing a make from Make the Day Special using Water Blooms - a really pretty and useful floral set.  I was inspired by the colours at this week's Less is More of green and yellow and wanted to play around with just one image but make the focal image stand out by stamping it in a contrasting colour.


I took the large bloom from the stamp set and stamped it with a pale green ink onto green cardstock in a repeat pattern to form a simple background.  Then to create my focal point image I used the same stamp but stamped in pale yellow ink onto yellow card stock.  To add some interest and definition, I used a darker yellow copic to add a little shading to this image and added glitter to the dots.    I used the same darker shade of yellow to create a mat to make it stand out from the background.  Some yellow gems finished the flower centres and I added a sentiment from Healthy Vibes by Papersmooches as I needed a get well card for a friend who just got out of hospital.

Sunday, 23 February 2014

Trendy Metals

I have a couple of cards to share today.

Firstly, I managed to have a go at the WPlus9 birthday challenge which is all about trend watching. http://www.stampawaywithme.blogspot.co.uk/2014/02/birthday-celebration-week-3-trend-watch.html


I think I may have thrown one too many trends onto one card lol!  I went with metallics, grunge, misting, diagonals and sequins!  I stamped and embossed the fish from Fish More in gold and die cut them with the matching dies and adhered them to a diagonal blue strip with sentiments embossed on the diagonal too.  I added some grungy splatters using a distress stain and them misted over that with some metallic blue spritz before running the dried piece through an embossing folder and adding some dotty gold washi tape and 3 sequin "bubbles"

My second card is my take on this week's LIM theme of "metal" and is my make for my Store's blog today.

I started with the super-cute owl from Papersmooches Hooties set - you get 3 in different sizes and there are dies to match so there's always an owl to fit your branch!   I die cut him from kraft, coloured him with polychromos pencils and blended with paper stumps and then redrew the lines in a shiny black pen for a comic book look.

For my branch I die cut a branch using a Clearly Besotted die as sadly PS didn't do dies to match the branches only the owl from some thin copper sheet and embossed it with a woodgrain folder.  The leaves are die cut from green metal sheet using leaves from WPlus9's Fresh Cut Florals (currently oos but more are en-route) and then the detail hand embossed with a ball tool.

I created a background for the branch with a die cut circle of striped blue vellum and added my traditional dotted line finish around it before adhering the metal with glossy accents.

Now, if there is one thing I think every crafter needs it's sentiment stamps and that's why I couldn't wait to get my hands on this new Happy Birthday set from Papersmooches - it's jam packed full of lots of lovely, interesting and unusual sentiments perfect for birthday cards for young and old, male and female.  I finished my card with one from the set which had the right shape and size to add balance to my CAS design.


Saturday, 22 February 2014

Waltzingmouse Guys

It's time for another challenge over at Waltzingmouse Fanatics and this time we just want to see a card for a guy.   I love making masculine cards but couldn't choose a set so I decided to combine our challenge with another to help me make my choice and I used the sketch at Seize the Sketch which led me to My Kind of Guy.


If you're a regular visitor here you're probably not surprised to see kraft - I just think it works so well with masculine cards.  I started with the central panel and stamped the rectangular frame in a darker brown and punched each dot with a pokey tool so I could stitch the border with twine.  Before stitching I masked off the edges of the frame and stamped half the panel with the woodgrain border from Way out West in grey to match the sketch.  I added sentiments from My Kind of Guy in brown and black and popped the little bowler hat (LOVE that hat!) over the G on guy and then used a fine pen to highlight the words in the middle.

Once I stitched the border (and made my fingers sore with the stupidly thick twine I chose!) I die cut a circle in black and embossed it with a woodgrain folder (SU) to match the panel.  I added a stitched border (hand drawn) to the card base and then mounted everything with foam squares.  I finished with the mustache from My Kind of Guy stamped in black and fussy cut.

Hope you like it - we can't wait to see your guy cards over on the challenge blog  http://waltzingmousefanaticschallenge.blogspot.co.uk/

Friday, 21 February 2014

Make a Wish

I've been meaning to join in with the challenge at Clearly Besotted since it was posted a couple of weeks ago but have only just found time to play tonight and I only managed 4 of the 6 colours....


I used the adorable new Dandelion Dreams stamp set and stamped the flower heads first in light blue and then offset stamped them again in dark blue to get a 3D effect.  I drew the stems by hand (what do you mean you could tell lol!) using a memento pen in pear tart and then stamped the sentiment across in red.  To finish I used one of the seed stamps and stamped a few wafting around in pale blue.  I like the flowers but the stems are off - perhaps I need to add some leaves?

http://www.stampingsharing.blogspot.co.uk/2014/02/clearly-besotted-challenge-8-colour.html

Sunday, 16 February 2014

Bold Botanicals

It's my day over on my shop's blog today and as we've received a lovely box full of the new release from Papersmooches this week, then that's what I've been playing with and my card today was inspired by the challenge at CASology where the cue word is bold.  So I took some of the blooms from Botanicals 1 and used them boldly!


I stamped and embossed 3 of the blooms into a little cluster in bold black and then used 3 bright distress inks to blend the background.   Simply matted onto black to emphasise the bold colour contrast and then with a banner sentiment featuring the gorgeous new scripty sayings embossed in white.

There are almost endless possibilities using the two bontical sets and they are really dramatic in black!


As the challenge on the Papersmooches Sparks challenge this week is "anything goes" then I'm going to join in the challenge with this card too  http://papersmoochessparks.blogspot.co.uk/2014/02/february-16-22-anything-goes-wk3.html

Saturday, 15 February 2014

Old Salt

I have made a card today for a couple of challenges - this weeks' theme at LIM is Masculine so I've taken that and used the current colours from our Waltzingmouse challenge to come up with this:


I embossed the boat and sentiment from Ocean Bound in vanilla white onto a stitched edge journalling card and then stamped the hills from Way Out West in dark blue before blending the sky in purple (around a masked moon) and the sea in blue distress inks.  I used a pearl spritz to give the moonlight some shimmer in the sky and on the sea.   I used the rope from Tying the Knot to add a little decoration to the base card before adhering the panel.

You've still got until Thursday to join in with our colour at Waltzingmouse Fanatics...........


See you tomorrow for my Make the Day Special Stamp Store post.

Thursday, 13 February 2014

New member of the family....

I've finally managed to get a little time to play with my lovely new stamps from Clearly Besotted to make a very special card for our new Great-niece.


I strung my little row of onsies onto silver and white twine by punching holes in the necks - super quick and easy with the stamps and matching dies.  I die cut the stork from copic colouring card and coloured him in and then cut down the center of his beak so I could slot his precious cargo in.

The sentiments are a mixture from the CB sets (cut apart a bit to say what I wanted) and then for the names and date I used the VERY useful alphabet set from Lawn Fawn called Milo's ABCs which is brilliant as it has multiples of all the letters so it makes customising greetings quick and simple.  I stamped and embossed them in pink on the grey card stock as grey and pink is one of my favourite colour combos.


Sunday, 9 February 2014

Bold Blooming Heart

It's one layer week at Less is More and it's anything goes so I decided to get smoochy for Valentine's Day with some Papersmooches blooms in a heart mask http://simplylessismoore.blogspot.co.uk/2014/02/one-layer-week-158.html.

I also decided to double up on challenges and enter this project to this week's CASology challenge where the cue word is "AND" with the romantic sentiment I opted for  http://casology.blogspot.co.uk/2014/02/week-81-and.html

It's also my project on my shop's blog this week  http://makethedayspecialcards.blogspot.co.uk/   as we have a large delivery of new Papersmooches goodies that will be in store in a couple of days ;-)


I die cut a heart mask from a sheet of scrap paper and stuck it over my card base and then stamped an arrangement of flowers and leaves from Papersmooches Bold Blooms through the mask onto the card (if you try this technique with large stamps like the leaf I used, a good tip is to not use an acrylic block - just put the stamp on the card and hold it in place with one hand but press it with the other - I find this gets you closer to the edge of the mask)

I stamped the sentiments from WPlus9's Valentine's Wishes over the top in Versafine black to make it stand out and then I traced around the die with a black glitter pen to tie it all together.

http://www.makethedayspecial.co.uk/shop.php#!/~/product/category=3351881&id=32781849http://www.makethedayspecial.co.uk/shop.php#!/~/product/category=2717738&id=18666079
http://www.makethedayspecial.co.uk/shop.php

Saturday, 8 February 2014

Je t'aime

We have a new challenge over at Waltzingmouse fanatics for you today featuring some deep rich colours.


I combined the colours with the sketch from retro sketches - even though I missed the deadline for it - as I really like it.


I used Paris Nouveau and French Country and selected copics in the shades of blues and purples and coloured strips of card to match the flower motifs I coloured and cut out.  I stamped the Eiffle Tower and fussy cut it out and attached it to a stitched journal die cut panel.

Hope you have fun with our colours this time around.

Sunday, 2 February 2014

Coming Up Roses

Morning all and Happy Sunday.   Sunday's are my day on the Make the Day Special Stamp Store blog and today I have a card to share that I made for my Aunt whose birthday was this weekend and I went all out with some of my favourite sets from WPlus9.


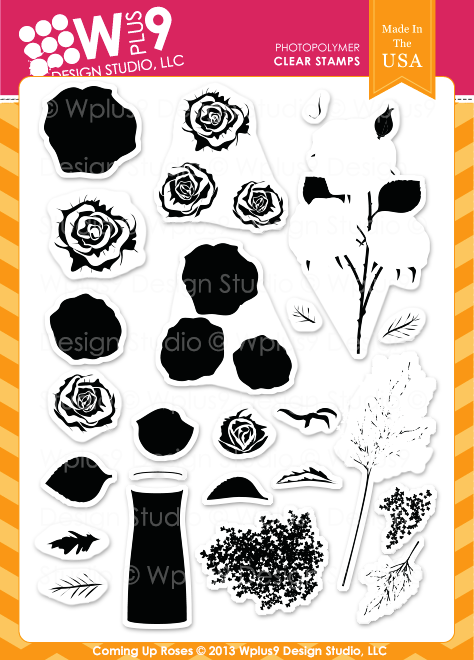
I started with the lovely new Coming Up Roses set and stamped the multi-bloom spring directly on the base card in green adding the triple rose stamps in red with deep red for the top layer.  Next came a floral fest of stamping a die cutting using all the different blooms in the set in red, pink and yellow.  I love playing florist with these sets and I simply arranged the die cut and stamped blooms in place with pin flair gel for dimension around the vase which was stamped in blue with grey edges.

I used the Aunt stamp from Embroidered Bouquet Additions and embossed it in white on grey card and cut a little banner for over the vase.  The best wishes sentiment is from Fresh Cut Wreaths - I like to use sentiments on the front I can carry on into the middle so I added "on your birthday" inside.

I finished the card with a little DP (from my scrap box so no idea what its from sorry!) and my favourite twine - I love the thickness of all the Lawn Fawn twine but this triple set has my two "go to" colours of teal and grey so I use it a lot.  A simple line of it with a knot adds interest to the design without getting too fussy.

As this is very CAS which is very much my signature style I am going to enter it into this week's Birthday Week Comfort Zone Challenge at Wplus9's blog http://stampawaywithme.blogspot.co.uk/2014/02/birthday-celebration-week-1-comfort-zone.html

http://www.makethedayspecial.co.uk/shop.php#!/~/product/category=3351881&id=32781808http://www.makethedayspecial.co.uk/shop.php#!/~/product/category=3351881&id=32781823


http://www.makethedayspecial.co.uk/shop.php#!/~/product/category=3351881&id=32781821http://www.makethedayspecial.co.uk/shop.php#!/~/product/category=3351881&id=24370359http://www.makethedayspecial.co.uk/shop.php#!/~/product/category=2717767&id=12122472


Saturday, 1 February 2014

Rainbows

I'm super excited this morning as my favourite challenge blog turns 3 - can you believe we've been making CAS cards for 3 years?  When I think back to my first one layer card - oh my - how things have changed!   What is even more exciting for me is that I'm guesting on the challenge this week - eek - I told you today was exciting!!  The theme this week is rainbows and here's may take on it  http://simplylessismoore.blogspot.co.uk/


Isn't he just the smiliest leprechaun?   He's from Papersmooches "A Magical Spring" (yes I'm wishing away the rest of winter - had enough now!) which has some really useful images as well as fun sentiments.   I stamped him onto some watercolour card so I could colour him with my distress markers (are you fed up of me saying how much I love them - sorry I'll get bored of them soon I promise!) and I fussy cut him, the crock pot and coins.  I used another piece of watercolour paper to freehand my rainbow with the markers and then I stuck the images in place over the top.  The sentiment is from the same set.

The third exciting thing is that my new store is also this month's sponsor at Less is More so if you play along throughout February you could win a little spending spree in the Store ;-)

Blogging tips