Saturday 31 August 2013

Busy Bee

I've been a busy little crafting bee this morning - I have a week off from work and I'm starting it as I mean to go on - enjoying myself!   My hubby's holiday doesn't start until 5.30pm so it means my first day gets to be spent in the craft room having fun - so much so in fact that I didn't remember to eat breakfast til he called me at 11.30!

First off - I've had a go at this week's Less is More challenge which is simply to use a rubber stamp, but with the additional challenge of adding watercolour if you can, and Penny Black are playing along this week too so I decided to play with one of their cling stamps.  http://simplylessismoore.blogspot.co.uk/2013/08/week-135-use-rubber-stamp.html


I selected one of the two floral sprigs from their set "fanciful" and was inspired by Birgit's technique of using water colour pencils to "ink" up the stamp - never tried it before but I have to say I will be doing it again in the future as it's easy-peasy and the results are just fabulous so thanks Birgit!  I used a green for the leaves and then a pink and peach for the flowers - I went them to ink the stamp but then used a fine water spray just before stamping to get it nice and wet and watercoloury again.  Simply finished with a strip of green card and my favourite Anniversary sentiment from Waltzingmouse - this card will go to my Aunt and Uncle who celebrate their anniversary tomorrow.

I also finally got around to playing with this week's cue word at CASology which is "BOOK" http://casology.blogspot.co.uk/2013/08/week-59-book.html


I combined one of my all time favourite stamps with my all time favourite technique of paper-piecing as it just suits the stamp so well.    This set is from My Favourite Things and is called "Well Read" and has a selection of 5 or 6 brilliant bookish sentiments.   I started with the sentiment and drew a frame around it on a 4x4 base card.  I then set about playing in my snippets box selecting a suitably sofa-ish pattern and some tonal scraps for her clothes and the pillows.  Once pieced I used my toner grey copics to add some depth and squishiness to the sofa and my skin tones for her arm and legs.  I shall be doing a lot of this on holiday too as I'm half way through "The 19th Wife" and finding it so fascinating that I can't wait to finish it.   I would have added this to the snippets challenge over at Di's blog but I'm a bit late and the playground gates have shut for this week - check out the new challenge tomorrow though - the gates open each Sunday and all you have to do is use up your scraps to enter http://pixiescraftyworkshop.blogspot.co.uk/


Friday 30 August 2013

August Pajama Party


It's PJ party day again at Waltzingmouse stamps and who doesn't like to party in their pjs with their crafty buds?   Well I'm in for sure. http://waltzingmouse.blogspot.co.uk/2013/08/invitation-to-wms-pajama-party-on-30th.html

There are 4 challenges this month that you could pre-prepare, plus the bedtime story sketch which will be revealed later.  I've had a go at all 4 this month (although I have combined two into one so I hope that's ok!)

The first challenge was "Tie a Knot in it" and I just adore the new knot set.   I decided to make a wedding card with it.  I embossed the frame onto a scrap of kraft card in gold and then masked the edges so I could stampt the heart into the middle.  I then used picket fence distress ink dauber and rubbed it all over quickly buffing it off with a damp paper towel - the white has come up really harsh in the photo but irl the kraft shows through much more.  Once dry, I stamped the sentiment over the white above and below the heart and cut the frame out by hand.  I stamped the straight rope onto a kraft base card and embossed in gold and then lined up the frame so the lines matched up.  The frame is popped up on dimensional foam for added interest.  I finished with the twisted rope embossed in gold at the bottom.  I think this would be a great card for a natural beach wedding.


The second challenge this month is "Get Naughty" which was the perfect opportunity to play with the new ocean bound set and I knew instantly which image I wanted to play with first - the life preserver ring!


I divided a 3x3 inch card into 9 boxes with very light pencil lines and then stamped the image 8 times to fill the card - although I left the central ring empty.  For the central image I stamped the ring twice onto 300gsm card and fussy cut it out.  I left some extra length on the "red bits" on the top image and totally cut off the rope - this allowed me to replace the rope with some bakers twine which I thought would make the central image a fun stand out embellishment.  I used glue dots folded over for dimension to stick the top image the bottom one and used the rope image on the bottom one as my guide for my twine, folding the "extra" card around the back to keep it place.  Once I was happy with the twine, I carefully cut the rope off the bottom image and my embellishment was complete (hope that makes sense - it reads more complex than it was to make!)  I finished with a simple folded banner sentiment to bring out the red.

For the final project I decided to combine the colour theme challenge with the Golden Oldie challenge:


For the golden oldie element I decided to use the first stamps I ever ordered from Claire - I found her brilliant company after doing a google search when I bought my spellbinder labels dies to see if there were any stamps to fit them and came across the genius that is Rescue Remedies!   So I decided to use one of the stamps from that set combined with the colours from the inspiration photo to make a quick and easy wrapper to go around a bar of chocolate - doesn't it make it look so much prettier - the perfect little pick me up for a colleague having a tough day!


I used the labels 4 die from spellbinders to cut a piece of white card stock and then inked up the stamp with the black, red, blue and one of the greys from the colour combo (I use the small momento dew drop pads so the points are perfect for multi-coloured inking if you do it carefully!)  I then used a piece of blue DP and some paler grey velvet ribbon to mount the label onto and hey presto - a pressie for a quid in less than 10 minutes which can only be a good thing!!!!


So that's the end of my PJ party projects for now - but I just wanted to hijack my own post for a minute to make sure all you Waltzingmouse Fans at the party are aware of the new challenge that starts next Saturday (7th September).   Deborah Frings and I are both HUGE Waltzingmouse Fans and we really missed the weekly sketch challenge so when we met this summer we cooked up a plan of launching our own challenge just for Waltzingmouse Fanatics like us - so with Claire's support and blessing (and even a prize for the first winner - shhh it's a secret!) we're launching http://waltzingmousefanaticschallenge.blogspot.co.uk/ just next week.   It will run fortnightly, not weekly, and will be a mixture of challenge types not just sketches - the only rule is that whatever you make has to use Waltzingmouse products somewhere.  

So if you haven't already checked us out - click the image below - select whichever "follow us" option suits you best and you'll get to see the first challenge when it goes live at 8am (GMT) next Saturday!   Don't forget to like us on Facebook too - the links to all our social media feeds are all on the blog.   We really hope you'll enjoy our new challenge - we're really excited to get started and to see who comes and plays with us :-)


Wednesday 28 August 2013

Birthday Doxie's


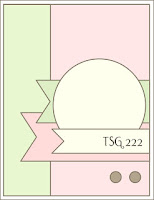
I needed to make a birthday card for a dog loving friend this week, and turned to the cute TSG Doxie with Moxie set to do it so decided to use this week's sketch as my inspiration too http://tsgclearstamps.blogspot.co.uk/2013/08/tsg222-release-week-sketch.html


I stamped the two dachshunds and coloured with copics and then dressed them up - love the super-cute sailor suit!  I added some balloons from their numbered days set and used the same colours as their clothes and a sentiment from birthday bots.  The DP is old - all about cats and dogs but I don't know the brand.  A few faux stitched lines brings it all together.


Monday 26 August 2013

Washi-washi

We've been busy out enjoying the sunny bank holiday weather so I'm late to the LIM party this week.   We spent the day at Hardwick Hall today - I'd share photos but my photography isn't great when it's not on macro for cards lol!  It's all about Washi tape at less is more this week and I decided to try and do something different with it http://simplylessismoore.blogspot.co.uk/2013/08/week-134-recipe-washi-tape.html


I started with a base panel of DP and edged it with pink after rounding the corners.  I added more white over the top to keep it CAS and stamped one of my favourite ever sentiments (clearly besotted) in the same pink ink.  I made a fishtail banner out of washi tape by sticking two pieces side by side onto cardstock first and tucked that under the main panel.  I used scraps of the banner to die cut some tiny hearts and added a couple of extra layers behind to give them a chipboard feel.  For my main element I decided to use some floral washi tape to make rolled roses.  I die cut a couple of circles and then just twisted the washi tape around making sure bits of the sticky side stuck to the circle all the way around.  I stamped 3 green flowers and then stuck the roses in the middle of each so the outers of the flowers became leaves of sorts.

There are some wicked ideas in the gallery this week - my love for washi-tape is somewhat renewed so I may even have another go later.


Sunday 25 August 2013

Papertrey Blog Hop August


It's blog hop day at Papertrey and there are a selection of colour and sketch combos to choose from - I was drawn to this blueberry number.  http://nicholeheady.typepad.com/capture_the_moment/2013/08/august-2013-blog-hop.html and this is what I did with it.


I die cut a circle of blue card and used the inner area of the die to draw white lines around the edge.  I used one of the roses from the sweet life set and stamped it with 2 blues and a plum (as close as I could get to the prescribed colours) and used the die cut to cut it out.   I added some die cut leaves (Wplus9) and some blue gems.  I finished with some more hand drawn stitch lines and a large sentiment stamped in plum.

Happy Hopping!


Monday 19 August 2013

muse


I've made one card for 4 challenges tonight - I've used the MUSE card from MUSE card club and flipped it upside down.  I've kept the floral theme which is also the theme for CAS on Sunday so that's number 2, and I've used the CASual Friday colours so that's number 3.  The final challenge is this week's Allsorts which is to use your new stamps - these came just last week and this is the first time they've seen ink - so that's number 4!


The stamps are from the fabulous new Funky Flowers set from Waltzingmouse stamps and after masking off the top of my card I stamped 2 leaves and 2 flowers with their matching middles in the green orange and aqua with a hint of black.  The sentiment is from the new Big Day Today set stamped onto an aqua scrap with some hand drawn dots.  I popped the sentiment up on foam for a little dimension so it looks the flowers are poking out underneath.


Here's the list of challenge links I'm entering this card into:

http://musecardclub.blogspot.co.uk/2013/08/muse-challenge-31.html

http://cleanandsimpleonsunday.blogspot.co.uk/2013/08/challenge-15-floral-fantasy.html

http://cas-ualfridays.blogspot.co.uk/2013/08/cfc112.html

http://allsortschallenge.blogspot.co.uk/2013/08/week-220-use-your-new-stash.html


I don't usually manage this much creativity on a Monday so I'm making the most of my mojo while its in residence!

Saturday 17 August 2013

Round and Round

Round and Round is the order of the day today at Less is More http://simplylessismoore.blogspot.co.uk/2013/08/week-133-round-and-round.html    At first I thought that was going to be easy until I realised it wasn't just a round object they wanted but something that actually revolves!   I did have an idea this evening though when I tidied up my VERY messy craft desk and I came across a scrap of card I'd embossed that led me to this card:


The embossing folder is called Uber by Couture Creations and I simply embossed it in black and then used silver and bronze rubbing wax to pick out some of the details.  I stamped the Earth - cos that rotates don't you know ;-) from There She Goes' Out of this World set and coloured it with copics before cutting it out and sticking it on.  The sentiment is made up from two sentiments from the same set embossed in silver.  

I have a big list of cards I have to make right now so best get on it.


Friday 16 August 2013

Cyber-metal

Just a quick post tonight as we have to be up early so I need to get to bed....

My hubby wanted a card for his boss whose birthday is today and I picked something up at Lakeland this week that was perfect for him as he runs a Sci-Fi/Comic shop so this is his Dr Who themed card


I made the cyberman using a Dr Who chocolate mould which has lots of fun characters - instead of chocolate I used cloud clay which I embossed with silver once it was dry.  This makes it metal (ish) so fits the current theme at Cards for Men http://cardsformen.blogspot.co.uk/2013/08/challenge-16-heavy-metal.html

I finished with some layering with black card and sequin material in a shimmery sci-fi holographic blue, a simple sentiment and a hand drawn border.

Thursday 15 August 2013

My First Special Issue :-D


If you've got the latest Special Issue from Paper Crafts Magazine - Holiday Cards and More Volume 8 - then please turn to page 66 as you'll see my first ever project to make it into a Special Issue :-D


Now this one is particularly special for me as it uses what are probably my all time favourite stamp sets - the wonderful Way out West and Back in the Saddle sets from Waltzingmouse - living in the middle of England, there's not much call for cowboys, but for some reason I just LOVE working with these sets so am thrilled to bits that I managed to get a card published with them.  Like the first time I made it into the magazine the card is also on kraft - also a love of mine so I guess it must be lucky for me.  The challenge for this submission was to make a Christmas card without using any Christmas imges - you were only allowed a single Christmas sentiment.

Here's a closer shot


It was simply a case of masking the top half of the cardstock and stamping the yonder star background in crumb cake ink for a tone on tone background onto which I stamped the row of stars which each got a tiny yellow gemstone centre.  I then stamped two of the backgrounds from Way out West onto the area I'd masked off.  The far hills in crumb cake and the foreground in chocolate pearl.  I added the cowboy on top in the same ink.  The yonder star sentiment was embossed in gold with a gemstone star and some glitter in the sky.   I edged the whole panel with gold ink and then added a couple of rows of twine and finished with a matching bow.


Tuesday 13 August 2013

Trendy Triangles


Triangles are all the rage at the minute and there is a moxy fab challenge to show off how to use them http://www.moxiefabworld.com/2013/07/the-trendy-triangles-challenge.html and I'm coupling that challenge with the new colour challenge at Clearly Besotted this month as I'm using their set for my triangle http://www.stampingsharing.blogspot.co.uk/2013/08/clearly-besotted-challenge-3-colour.html


I used one of the small triangles from the new The Sky is the Limit set which is actually one of the parts of the kite.  I simply stamped it in 4 of the colours from the inspiration shot turning it upside down and back again to create two border strips.  I added one of the sentiments from the also new Many Messages set inbetween in black which makes a big bold statement on a little CAS card.


Monday 12 August 2013

A CAS approach to a sketch


It's the CAS team's turn to take on this month's sketch at House of Cards today and I thought I'd try and show you that you can take what looks like a full-on layered sketch and turn it into a one layer CAS card but still with lots of interest.


It's very easy really - you just need to work back to front, starting with the foremost "layer" and then masking everything off and stamping to put the next layers "behind" the focal image.  So I began by stamping the Camellia from Waltzingmouse and embossing it in white and heat setting.  I stamped it again in black onto post-it tape (fully sticky all over) and fussy it cut it out to create a mask which I stuck onto the stamped flower.  Next I stamped a leaf from the set over the mask and onto the base card on either side to represent the dots on the sketch - again embossing (after taking the mask off).   I stamped two leaves onto post-it tape again and masked off the flower and leaves this time.

To create my circle, I used a new stamp from IndigoBlu which just drew me to it at a recent show as I thought it would be useful for this sort of card.  It's called "square peg round hole" and I simply stamped it in wet cement ink from Hero Arts.  Again I stamped it to make a mask (this time onto copy paper as the post it tape isn't wide enough) and roughly cut around it to make the circle shape on the sketch.  To create my "band" I stamped a triple stripe from the Basic Stripes set from Clearly Besotted in black ink.

Once all the stamping was done, I went back to adding interest to my focal flower - I used a quick water colouring technique (hence the embossing in the first place) - I just used two pink shimmer paints and two green, painting the lightest on the outside and darker in the middle and quickly blending.  I used the smallest amount of water I could get away with to ensure the card didn't buckle as I wasn't using water colour card stock.

I finished with a decent sized sentiment (Hero Arts) to give the large card some balance but still giving an overall CAS feel.

So now it's your turn - hopefully I've inspired you to give CAS a go!


Saturday 10 August 2013

Number Bots

I was a bit stumped for an idea for today's One Layer With Numbers challenges at Less is More when I saw it first thing this morning - but then I went to collect a parcel from the post office and it was some lovely new robot stamps from The Alley Way Stamps that had come from Germany again (thanks Carolin) and it sparked a couple of ideas:


OK, so there's only one little number on this first one but I bought this set (Crazy Circuits) specifically for it's Dr Who slant as my hubby and lots of his friends are big Dr Who fans so this set will get a lot of use.  I added the K9 using an old Elzybells alphabet set and a sentiment from Doxie with Moxie from There She Goes.  I coloured the robot with metallic pencils.


Now if the first one doesn't count, then this one should as there are a 3 whole lines of numbers on this one!  This is a sentiment from another TAWS set - Iconic which I bought for the binary pun as I think you can switch out the sentiment as just add (in Robot) to any other sentiment and it would still work.  I paired it with another cute robot from their older Bot Time set which I'd been trying to resist but folded.  I do love a robot stamp!  Again he was coloured with metallic pencils - this one reminds me of Johny 5 from Short Circuit!

Right - I have a craft room that's not going to get any easier to work in unless I tidy up and put some stuff away......


Friday 9 August 2013

Calling all Waltzingmouse Fans


Well today is the day that I can let out the little secret I've been keeping for a few weeks - Deborah Frings and I are launching a new challenge site for all fans (like us) of Waltzingmouse Stamps.  The challenge will run fortnightly on Saturdays and will feature a variety of challenges - sketches, colours and themes and the only rule is that entries have to include at least one Waltzingmouse product on their projects.  It's not just about cards it can be scrapbooks, altered items, gifts - you name it - anything goes as long as you follow the theme of the fortnight and inlcude your Waltzingmouse stash.

The first challenge goes live on 7th September but if you head on over to the blog today you can see the pictures of Deborah and I clutching our Waltzingmouse stash ;-)

http://waltzingmousefanaticschallenge.blogspot.co.uk/

A Slice of Happiness


I'm combining a couple of challenges today - the first sketch from Seize the Sketch http://seizethesketch.blogspot.com.au/2013/08/seize-sketch-1.html along with the theme this week at CASology which is "dessert"  http://casology.blogspot.co.uk/2013/08/week-56-dessert.html  and this is the result:


I used an old red rubber stamp set and I'm not a hundred percent sure who it's by - possibly CC Designs?   Anyhow - it's a fabulous big slice of cake and comes with lots of appropriate cakey sentiments which are perfect for the recipient of this card on this cake and chocolate day ;-)   I coloured the cake with copics and fussy cut with a border to make it stand out against the kraft.  The sentiment is white embossed.  The strips of paper are both from an old DCVW mat stack which is again cake themed.  Finished with some dotty white lines to frame the top empty space and some glitter around the candle flame and a little glossy accents action on the cherry and swirl.


Thursday 8 August 2013

New Clearly Besotted Stash!

Don't you just love it when you get home from work to find an envelope full of new goodies on your doormat?   Well thanks to the brilliant service from Stephanie at Clearly Besotted, that's just what happened yesterday so obviously I had to go and make a card with them straight away - I just didn't get time to blog it last night.
 

Very simply card made with this sketch in mind from CASE this Sketch  http://casethissketch.blogspot.co.uk/2013/08/case-this-sketch-39.html  


I used the adorable poppies from the new "Remember" set stamping the leaves in two shades of ink and then stamping the black outline before over stamping the red with the corresponding solid stamps.  I LOVE this set!   I used two of the sentiments from the same set embossed in black on vellum - card done in under 10 minutes.


Monday 5 August 2013

Bedtime Story Sketch

I only managed to make an entry for 2 of the 3 "on the night" challenges for the Waltzingmouse PJ party but the fourth challenge is open for a week and it's to create something based on this sketch http://waltzingmouse.blogspot.co.uk/2013/07/wms-pajama-party.html

I tried and tried over the weekend to make something for this sketch - I had LOADS of ideas but they all turned out pretty "meh" or even worse......

The first idea I had was to play with the two crackle stamps - having one below the band and the other above - which I think is an idea I will return to - perhaps just not in grey on kraft with a black distressed edge which as you can, looks frankly awful!   I tried to pretty it up with yellow and flowers but it just make it look even more depressing.....


My other efforts never made it as far as a card, and so in desperation I had another go tonight using a bit of a background I'd made for another idea that bombed as I really wanted to get in on the first challenge but didn't want to link up my first card!


For this one I used one of the frames from the modge podge melts that Claire is now selling in the store and inked it with adirondak wild plum alcohol ink.  I used it to frame one of the faces from the dolls set and added a couple of flowers either side to match the sketch.  I teamed the rainbow of dolls I'd stamped with black to tone down the colours a bit and then decided to leave the top white as it was all getting too busy with more background stamping above.

Better get linking up before the party closes without me!


Saturday 3 August 2013

Corn Colours


It's colour week at Less is More this week and when I saw the colour choices I was less than thrilled as they didn't really inspire me - sorry Chris and Jen!  In truth, it's not the colours per-se, it's just I find these colour challenges really difficult with any colours out of my comfort zone of blues and greens!   However I am involved with a soon to be launched challenge (a secret for now but watch this space for details soon!) that will involve regular choices like these so I forced my self to be creative with it and do you know what - I made what I think is my best card in ages!


The tree shape in the photo lead me to dig out my Waltzingmouse fine feathers again - I do love feathers!  This time I opted for ombre embossing on vellum and fussy cutting which I think makes for a striking effect.  Simply mounted on a double grey panel with some mustard twine and a grey button.  The sentiment is from the funky feathers set and I made a simple banner with it on kraft card and tucked it just behind the feather.  A little corner rounding to finish - et voila!   As Ms Waltzingmouse herself would say - hope it tickles!


Thursday 1 August 2013

Rev it up!

We're all about the boys here today - I made this bold guy card for my friends' husband who loves bikes with a new stampin up set I bought just for that purpose!


I coloured directly onto the stamp with my old Whispers Dual Tip Markers and then did the "huff" technique to make them wet enough to stamp.  I used the same markets to do a little shading on the tires and some of the chrome and fill in the black flash.  I used the red and black markers to ink up the sentiment and a black ink pad to do the tire pattern (and I was too lazy to get out my stamp-a-majig so I got gaps but I decided to live with it!)  I die cut using one of my favourite nesties - affectionately called the heinz label in our house ;-) and added a metallic red mat with the larger size.  I then embossed some grey cardstock with a spellbinders double folder if I remember correctly and added a strip of road washi tape across the middle before mounting onto a black base card.  The red and grey were from my overflowing scraps stash too so a tiny dent was made in that.....

So I'm going to enter this into a few challenges - firstly Pixie's Sunday Snippets as the majority of the card used was from my snippets draw http://pixiescraftyworkshop.blogspot.co.uk/2013/07/pixies-crafty-snippets-playground-week_28.html

Also, The Pink Elephant are looking for Masculine cards this week and this certainly fits the bill http://thepinkelephantchallenge.blogspot.co.uk/2013/07/the-pink-elephant-challenge-tpe210.html

Finally, there is a new challenge site which is all about cards for guys which I've started to follow after spotting it on my friend Deborah's site - I know lots of people hate making guy cards but I quite like it!  Their first challenge is anything goes so again, this fits the bill  http://themaleroomchallengeblog.blogspot.co.uk/2013/07/challenge-1-anything-goes.html 

Blogging tips