Saturday, 24 September 2011

LIM Sketch

Before we start on this week's challenge I think we all need to give a little round of applause to the Diva and Lady of LIM for their monumental commenting efforts.   There are soooooo many challenge sites out there where the DT NEVER comment on ANY cards so I know I for one really appreciate the time and effort Chrissie and Mandi put in to visiting us every week and to visit close to 800 blogs last week was amazing - so three cheers to you two :-D

This week's LIM challenge is a sketch - which was great as I really wanted to get some ink onto my divine new Waltzingmouse stamps which arrived on Thursday - and as soon as I saw the sketch this morning I knew exactly what I wanted to play with.  It's just taken a while to colour all the layers and cut it, with that and the washing machine repair man then for me this week my entry is a little tardy.


The stamp and sentiments are all from the delightful new Christmas Cottage set.  I stamped the cottage 3 times and coloured it like a gingerbread house using just 3 shades of copics (browns) and then my favourite super pale BG0000 which is perfect for snow.  I stuck to the BG colours for the paintwork too.  The central part of the cottage is decoupaged from the second image, and then from the third I cut the lamps and trees.  I coloured a yellow circle around the lamps on the second layer to show them glowing.  I finished it all with stickles for the snow, baubles and lamps and matted it on a blue background.  The "Merry Christmas" stamp is actually the same as the From our House to Yours - ie it has a dotted line and second sentiment line to it but I carefully inked it and took it off the bits I caught with a cotton bud (too hard to mask as the "y" goes below the dotted line).  The finished card is a 15cm square.

I really love how these have turned out and think they will be our "family" cards for this year.

Hopefully will get some time to comment this week.

Tara x

Friday, 23 September 2011

Final LIM for the 1000 challenge

I've managed to squeeze in just one final card before tonight's deadline for the LIM challenge - similar to yesterdays - but this time for Christmas.


I don't think the frosting technique works so well on a line stamp as it does a solid one - it just looks like I stamped it badly!  I also think I've gone too far the other direction with my score lines now and that they are too high!  I may have to make another one later to see if I can get it right 3rd time lucky....

Stamps are both from Waltzingmouse - Big Blooms poinsettia and the sentiment is from thew new Christmas Cottage set which is just adorable.  Stamped in red with white frosting over and red stickles for the berry centre.

See you all tomorrow for the new challenge - I hope they haven't got something difficult (like the dreaded acetate) up their sleeves after the easy anything goes week ;-)

x

Wednesday, 21 September 2011

CAS Frosting and a Cute Baby

I've seen a few people doing this frosting technique online so thought I would give it a go to make another entry for this weeks LIM challenge - trying to help them get to 1000 entries.


I scored some lines but in retrospect this should have been a bit higher up for balance and stamped my sentiment inbetween.  I stamped the fern in rich cocoa, cleaned the stamp quickly and stamped over the top with frosted white and gently smudged with my finger to get the frosted effect.  I stamped the goldenrod over the top in black and did the same frosted white smudging technique.  I really like the effect but it doesn't show up well with the flash unfortunately.  I think this would make a great masculine card.  All stamps are by Elzybels (sadly no longer trading)

I'm also entering this into The Secret Crafters's One Layer Challenge

I'm also sharing another card which I made for a friend who's little boy arrived early last week - no CAS enough for a LIM entry but I'm really pleased with how it turned out.  Love this range of stamps (Fizzy Moon) and have just got the Christmas ones.  I coloured him on kraft and paper-pieced the star and ribbons and went very spotted with dp, ribbon and papers.  The mum got it today and is thrilled.


 I'm entering the baby card in Cute Card Thursday's Anything Goes Challenge and Crafty Ribbons Anything Goes Challenge

See you tomorrow :-)

Tuesday, 20 September 2011

Cats Protection

I'm making cards for our local Cats Protection League - we got Lottie from them 4 years ago - and they are currently struggling, as lots of charities are in the current economic climate - so I'm trying to do a bit more to help them.

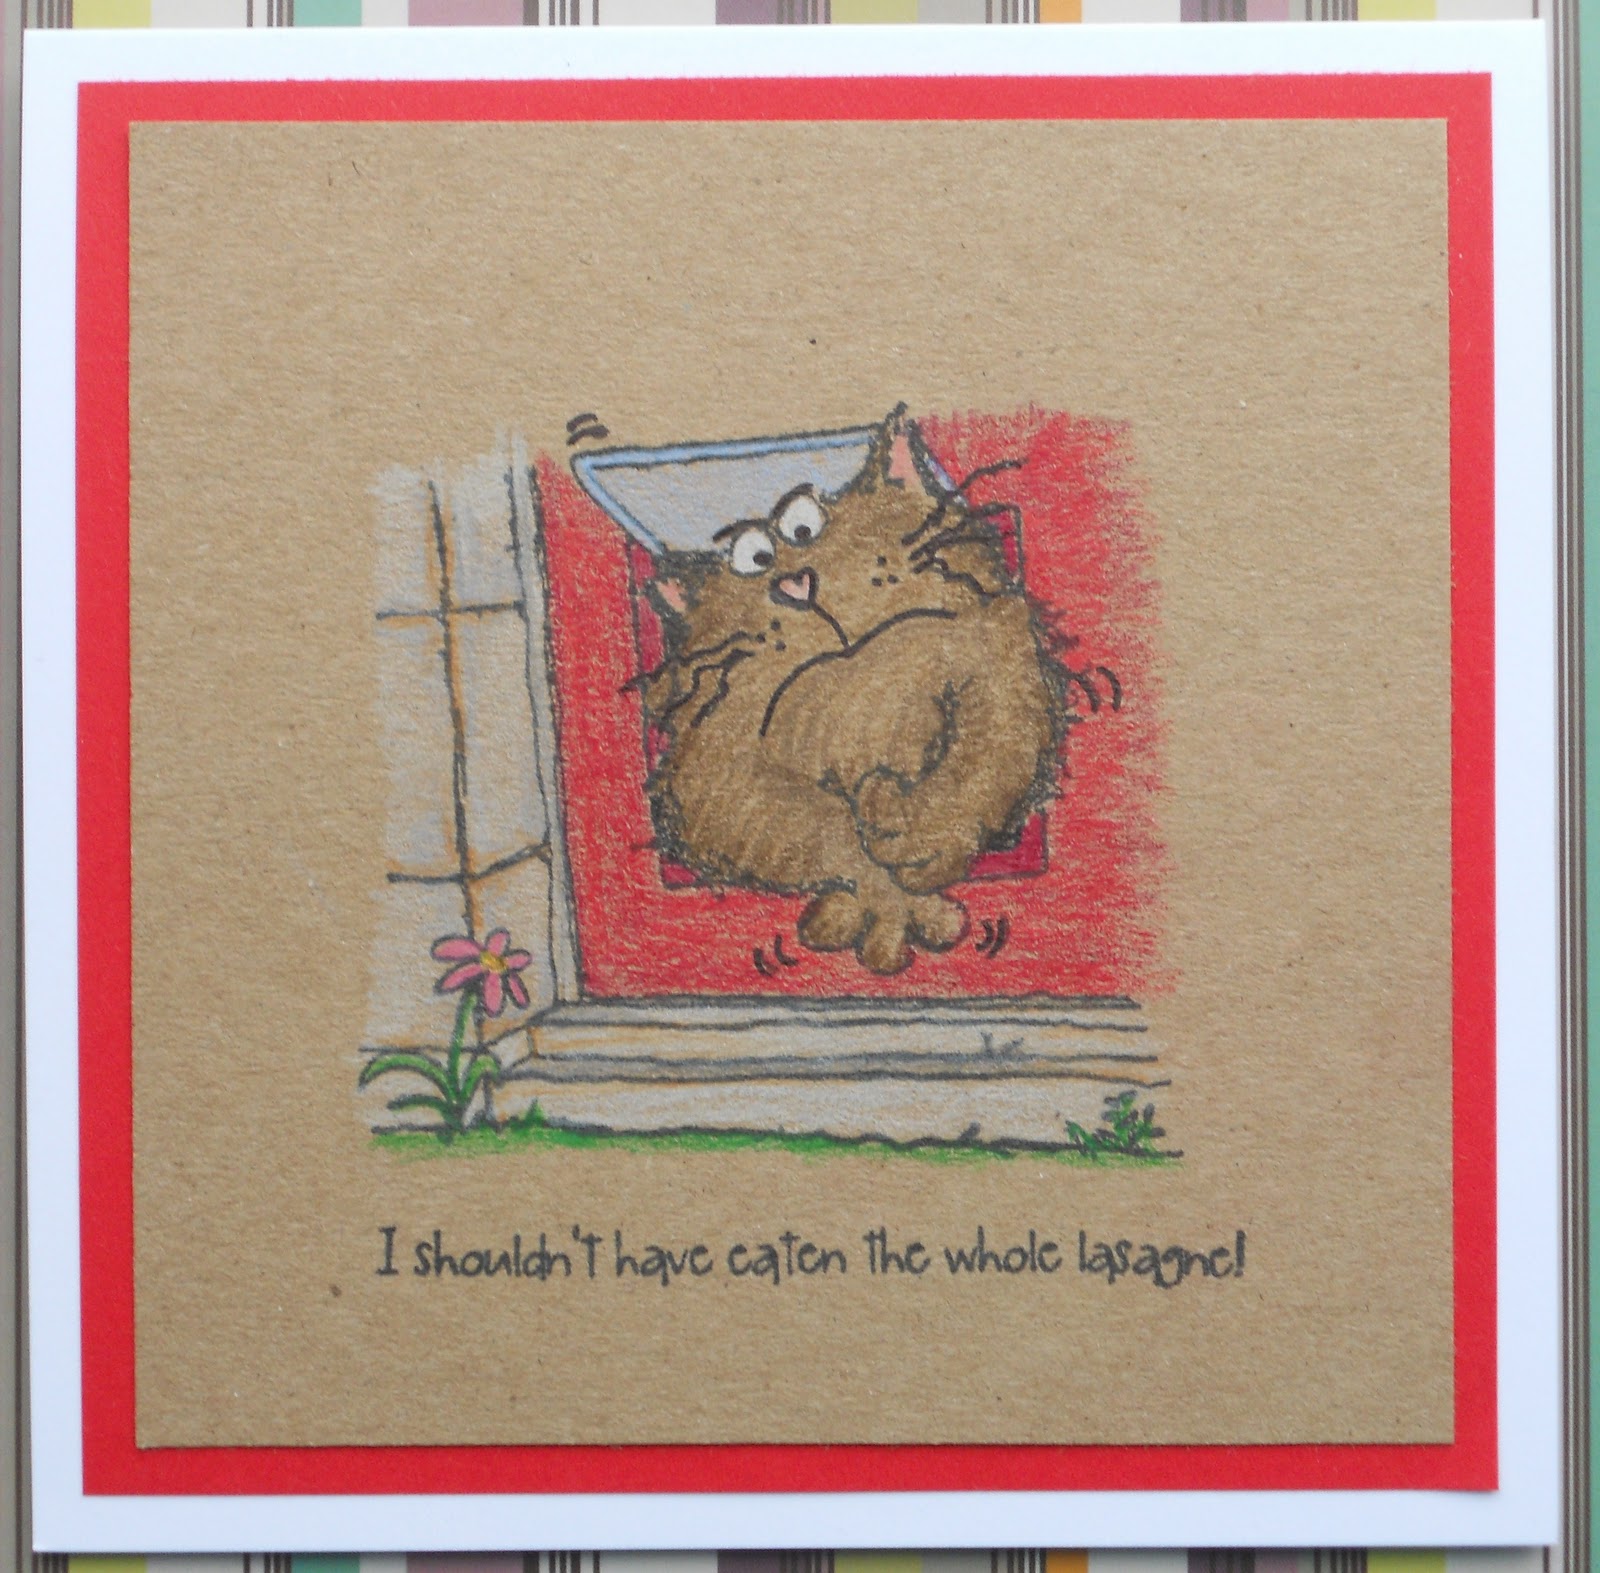
I love the range of "Magnum" stamps from Ladybug Crafts - he's such a great cat to colour and I think the humour will appeal to cat lovers, so I've started my collection of cards with a couple of Magnum cards.


Image stamped on kraft and coloured with polychromos pencils and finished with one of the matching sentiments from a separate sentiment set.


Unfortunately, there isn't a "scardy cat" sentiment with the sentiment set to go with this image, so I stamped a simple Boo! with my Elzybels alphabet (possibly the most useful set of stamps I own!!!)  This was also stamped on kraft and coloured with pencils.

They are looking for animals over at the Ladybugs craft challenge site this week so I'm entering my cards into their challenge - http://ladybugscraftsinkchallengeblog.blogspot.com/2011/09/its-finally-here-ladybug-crafts-ink.html

Thanks for stopping by :-)
Craftilicious x

Today's LIM....

is a general celebration card - this will be one of the ones that goes into my box to donate to our St Luke's Charity Cards sales.


The champagne bottle stamp is a wood mounted stampendous stamp, coloured with pencils and stickles.  The sentiment is made with an elzybels alphabet.

Are we anywhere near the 1000 entries yet?  Come on LIMettes - we can do it!

Monday, 19 September 2011

Mini CAS

Just a quick post with another entry for both this week's "mini" card challenge over at CASual Fridays, plus a 3rd entry for this weeks LIM as they go in search for a 1000 entries - I'm going to try to post one every day this week to help them get there.


This is a tiny 2 x 3 inch card - I like these really tiny thank you cards as they are just the right size for a simple gift like a small box of choccies.  I masked off a strip with post its and stamped a grungy background in a soft green.  I added some red ric-rac ribbon and a flower I made with a pair of tonic punches (there are 6 and all can be interlocked together to make different flowers).  Finished with a simple sentiment from Elzybels and black gem in the flower centre.

Catch you later
x

Sunday, 18 September 2011

CAS Men's Card

It's my Uncle's birthday tomorrow and his hobby is painting so I wanted to make a "painted" card for him.  I'm not a painter though so I've used my pencils, but I think the design of this stamp gives the feeling of a painting.


I stamped it onto kraft as this is my favourite paper for using pencils and makes it easy for the white lighthouse to pop out.  I used just faber and castel pencils with only a tiny bit of blending for the sky and the horizon of the sea - over blending on kraft leads to pilling and holes....

Hopefully this is CAS enough for LIM as this will then be another on their road to a 1000 entries this week!

I'm also entering into the photo inspiration challenge at  http://foryourinspirationchallenges.blogspot.com/2011/09/fyi-challenge-14.html

Craftilicious x

Saturday, 17 September 2011

LIM go for a 1000

This week the Diva and Lady of LIM are trying to match their 1000 followers with a 1000 entries to this weeks Less is More Challenge - so it's anything goes to make it nice and easy on us.

This is my first entry - I will do a few more as the week goes on to help them reach their target - don't envy them the commenting marathon though!!!


I've used on the of fabulous stamps I won from A Passion for Stamps when the ladies kindly chose me as their August prize winner.  This image just spoke to me when I saw it as I could see how great it would be to colour and cut out, which is what I've done with copics and then I've added a sheer white bow and popped it up on foam pads.  The trellis is a MS punch that I've used on both sides of a strip of white card and the sentiment is from Verve.

Good luck ladies :-)

Craftilicious x

Friday, 16 September 2011

St Luke's Mid Month Inspiration

It's time for a little more inspiration for our month long challenge over at St Luke's Charity Cards Challenge which this month is a buffet.  You can make any card you like but you have to include 4 things from a list of 10 - check out the blog to see the whole list.  We have a great set of Waltzingmouse stamps as a prize this month so do join the fun!


This is a mini card - just 3 x 3 inches, which is the requirement for this weeks' CASual Friday challenge, so I am also entering this card into their challenge.  The four items I choose from our buffet were pattern papers, embossing, punches (die cut) and gems.

The patterned paper is from an old DCVW Christmas Stack and then I used a snowflake embossing folder on some blue mirri card and used these to create my background.  I stamped one of the christmas baubles from the Waltzingmouse Vintage Ornaments set onto silver mirri using stazon ink and cut it out with the corresponding nestie.  I popped this up on foam pads and finished with 3 blue gems.

Don't forget to check out the challenge for a chance to win - you still have a couple of weeks to play and remember our blog is a little different - we play for charity, so if you can spare the card you enter (or any other handmade card) then just post it to us at the address on the sidebar of the challenge site and we'll sell it for the charity at a local fayre.

Thanks for visiting :-)

Craftilicious x

Wednesday, 14 September 2011

Magical birthday

It's going to be another quiet week for me on the blogging front - DH and I are on holiday and should be going away on Friday for a long weekend but as I'm still  not feeling great we might be staying closer to home.  I do feel guilty blogging when he's off too though as we don't get much time together so I won't be around as much as normal.

I do have a card to share today though as it's best friend's son's birthday tomorrow and as he's just getting into the Harry Potter books I decided to go with this lovely LOTV image:


I've stamped it onto kraft cardstock and coloured entirely with my polychromos pencils - I love how they colour onto kraft and think they've added a rich texture to his purple robes.  I've layerd him up and added a magical birthday sentiment and some stars.  Fairly simple but 10 year old boys don't like frills!  As it's on a black card though I have decorated the inside to make it easier to write on:


For the first time ever, I am also showing the back as I've had a gorgeous personalised stamp made and it arrived this week so this is the first time I've ever used it.


I'm entering the following challenges with this card:

CES challenge - make it magical or spooky

The spotted chick's - that's krafty thursday 54

Make it crafty's make it purple challenge

Pile it on "layers" challenge


Thanks for visiting :-)


Sunday, 11 September 2011

There She Goes Birthday Doll

There She Goes is celebrating a birthday this week, and have come up with a cool and quirky challenge which ends today but I've just managed to make the deadline.

Day 1's challenge was to use one of their stamps to create a paper doll - I have a few of their sets but only one with a character so the choice of doll for me was 1 from 1.  Here she is:


Day 2's challenge was to take your doll out on the town and photograph her.  So today we went to the supermarket, which also has a clothes store in it, so I decided she was the kind of gal who would like shoes so here she is photographed trying on a snazy pair of leopard print pumps.


Day 3's challenge was to take her into the great outdoors - well the weather hasn't been great here, so the best I could manage was to photograh her in the bushes in my garden before the strong wind blew her away.


Day 4's challenge was an interesting one - she had to be "in the spotlight" so I decided to photograph her with Hugh Jackman, she is obviously worthy of hobnobbing with the Hollywood elite - I also used a torch to add a spotlight to her.


Day 5's final challenge was all about partying - well my doll's idea of a great party is a cocktail party and what better way to celebrate a birthday than with a classic martini - so here she is in the martini glass with a birthday banner.


I hope you enjoyed my little doll's exploits - thanks to TSG for such a fun challenge (even if I did get some VERY strange looks in the supermarket!)


Saturday, 10 September 2011

Mini Brayer Tutorial

I've had quite a lot of comments asking me how I made my less is more card this week, well more specifically how I created a mirror image of the cats.  It's actually quite an easy technique - all you need is a brayer and a steady hand.

First apply ink to your image and ensure its on a stable surface.  You need to use a very fresh ink pad so the ink stays wet a while.


Starting just off your image (left or right depending on which hand is your preference - I'm right handed so work right to left) in one smooth movement roll your brayer over the stamp while the ink is still very wet.  This should give you a perfect image of your stamp on your brayer.


Again, in one full and smooth movement, roll the brayer with the stamped image in one direction (doesn't matter which) onto your cardstock.  What I would say is that it's a bit tricky to get it where you want it, so always start with your "mirror" image first and add the normal one after.  It's quite tricky on a one layer card - you may need to "trim" to fit the space you wanted (here I used a full sheet of A4 folded in half and cut it to size after - quite a bit of wastage so perhaps a better technique on a layer you can cut out (or perhaps someone else knows a trick I'm missing for getting the brayer lined up where you want it!)


Now add your "normal" image where ever you want it - as the ink transferred from the brayer will be lighter, its best to take off the excess ink from your stamp before stamping it out - I forgot here so you can see my normal image is much stronger than the mirror.


Decorate, add your sentiment - et voila - mirror image - in the words of the meercat "simples".


I expect to see lots of mirror images from the LIMettes now!

Tara x

Seeing Double

Another quick post today as I'm still not feeling in full fettle but I did feel up to a little crafting this morning and it is LIMday afterall ;-)

Their challenge this week is a one layer card with a "double" image on it - so basically two of anything.  I've promised to make some cards for my local Cats Protection League which is where I got my cat from, so I thought this was the perfect opportunity to start.


The image I've used is actually a single cat, so to get double I used my brayer to get a mirror image so the tail is on the opposite side.  I added a little colour with pencils and blended it with blending stumps and sansoder.  Finished with a little greeting in red to match their handsome bow ties.  The stamp is by personal impressions.

Catch you all later hopefully x

Friday, 9 September 2011

Falling to pieces

It's been all quiet on the blogging front for me this week as I had a little procedure in hospital on Wednesday that didn't go well and left me feeling rather sore, so when I saw todays' CASual Fridays challenge - Falling to Pieces - it seemed quite apt, as I have been falling to pieces somewhat for the last couple of days!

However I did get a very nice pick me up, as when I felt well enough to sit up and have a look at the laptop this afternoon, I discovered that was the August prize winner over on Less is More

Here's hoping that this is the start of a good weekend and that things start to get back to normal around here.

As the CASual Friday challenge seemed apt, but not too complex while I'm still feeling a bit icky, I decided to have a go at making a card for it and this is it.


I stamped the leaf  from waltzingmouse 3 times onto some my minds eye paper using brown ink.  I cut them out and layered them onto a piece of the same my minds eye paper but this time from a 12x12 pad so the leaves were bigger and brighter, with brown card behind to tie it together.   I added 3 orange gems from Anabelle stamps (they were actually the prize I won on their challenge a few weeks back) and finished with a sentiment in brown, also from waltzingmouse stamps.

Right, am off for another lie down now.

Craftilicious x

Monday, 5 September 2011

Autumn trees

I am still in the process of tidying up my craft room (lifelong project I think!) but I wanted something in which to store my copic refills (I only have a couple to date as I've only had my copics 18 months and only needed to refill E00 and Blender so far) but instead of just bunging them in a box, I decide to be more creative, recycle something and make into something altogether more beautiful.

I started with an empty cardboard biscuit tin I saved from last Christmas, and cut into two pieces - it has a fixed metal bottom so will be strong enough for the copic bottles.  To decorate it, I was inspired by the Waltzingmouse Sketch Challenge this week, and by the card designed by Chrissie Stokes in this months Craft Stamper magazine to do something Autumnal so used my (current) favourite WM stamp set, Tiny Trees, combined with DP in hues to match Chrissie's clever inking (I'm not that brave with ink!)


First I covered the whole of the tube with a kraft paper base, measured gaps for the double mounted strips of paper and stuck them around the tube with strong adhesive tape.  I stamped the tree branches directly onto the dp on the tube, and stamped the tree shapes in blended inks onto kraft cardstock.  I added the branches over the top again and added a few leaves and cut the trees out and edged each one with gold ink.  I finished it off with a few fallen leaves using the same ink colours from the trees to pull it all together.

I am also entering this project into the following challenges:

Secret Saturday Challenge  Autumn Colours
Stamptacular Sunday Challenge   Anything Goes - The Sky's The Limit

I still have the other half of the tube, so I may do another in Winter colours to store something else!


Don't forget - we have a fabulous set of Waltzingmouse stamps as our prize this month over on our charity card making challenge blog in aid of St Luke's Hospice - so if you want to get your hands on some new stamps, check us out here http://stlukescharitycardschallenge.blogspot.com/

Catch you later
Craftilicious x

Sunday, 4 September 2011

Back to school notebook

Another just before the deadline challenge entry - I really ought to be better organised!  Anyhow, just in time, here's a notebook I made as a thank you for a colleague's daughter has been helping out in the office over the summer and who is about to go off to University.


I started with a great digi from Christy Croll at Tiddly Inks who have a reading inspired challenge this week - well this is a notebook designed for all the reading she'll have a Uni so I think it qualifies.  I am also entering into the final digi day at Stamp Challenges

I coloured her with copics, in pinks to match the notebook, and as I've mounted her onto blingy glitter paper, and added some flower stickers on a sticky tape runner, then I'm also entering it into Cooking it up with Katie's pink, blingy sticker challenge.  I cut her out and mounted her onto the DP which is from a DCVW stack (cupcakes I think) and I added an embossed "Notes" sentiment using an Elzybels alphabet.

As it isn't a card, and is an altered item then I'm also entering Cupcake Craft "alter it"Totally Papercarafts "not a card" , Crazy 4 Challenges  "back to school" and Wags n Whiskers "anything but a card" challenges

Thanks for visiting

Craftilicious x

Saturday, 3 September 2011

Metal Heart

It's Saturday, which means, a new challenge on my favourite blog on the block, Less is More, and this week the colour challenge is metalic.  I love metalics and use them a lot, possibly too much, but not usually in a CAS way.

I was very inspired by Chrissie's first inspiration card with the triple embossing - deep embossing is a technique I've been meaning to try but have always been a little scared by - so I decided to take the bull by the horns and give it a go - this is the resulting card.


I die cut a piece of soft metal sheet with a Marianne D swirl - I ran it through my machine several times but it wouldn't cut through fully so I ran round the outline with a craft knife to loosen it from the sheet.  The heart is a wooden shape which I coated in UTEE, 2 coats of silver ep, and then I added a touch of copper ep to the edges.  I stamped a lace stamp across the middle to add texture but found it left it a little dull, so I used a silver rubbing cream over the lace to bring back the shine.  Simply mounted onto black glitter paper with a silver matt onto a black base - I love black and metalics.

I'm really glad I tried this technique - its not nearly as scary as I thought it was!

I'll be doing the rounds to see what else everyone has come up with this evening.

Craftilicious x

Get your diva on!

A quick post to get an entry into a couple of challenges before the deadline.  It's been a while since I played along in the Kenny K challenges, but I do love his images so when I saw the chance to combine their challenge with stamptacular sunday's diva challenge I knew I had to play.


This is kitty katastrophe, coloured with copics and cut and mounted onto dp layers.  I added the 3 different papers, 2 flowers and ribbon to meet the kenny k requirements and I think kitty is the perfect diva for stamptacular!

http://stamptacularsundaychallenge.blogspot.com/2011/08/challenge-126-diva-tacular.html

http://kennykkraftygirlzchallenges.blogspot.com/2011/08/kenny-k-recipe-challenge-58.html

Catch you later
Craftilicious x

Friday, 2 September 2011

Literally speaking....

I've been pondering this week's great challenge at CAS-ual Friday all day - the challenge is to create something inspired by a book but only using red, black and white.  I kept coming up with all sorts of ideas at work whilst thinking about my favourite books, but when I got home, I realised I just don't have the stamps to live up to my ideas....

So, I sat and stared at my stamps for an hour and finally settled on the following:


My inspiration was "Breakfast at Tiffany's" which is a slight cheat, as I know it more as a film than a book, but the film is based on the original novella by Truman Capote so I hope it counts!

I masked off the edge of my card with post-its and then stamped a script background stamp all the way down.  The dress stamp is a large framed stamp by stampendous, which I stamped on white and cut and mounted onto red and black adding a single gem for the "Golightly" touch ;-)
 

As the colours for the playdate cafe this week are black and white with a splash of red, I am also entering this into their challenge.


Craftilicious x

Thursday, 1 September 2011

St Lukes Pick Four Challenge

Our challenge this month over at St Luke's Charity Cards Challenge is a card buffet - we have a choice of 10 embelishments and you have to use exactly 4 of them, no more and no less.  I opted for pearls, ribbon, punches and embossing (my sentiment is heat embossed) - if you want to know what else you could choose then you'll have to check out the challenge site where you will also find the rest of the Design teams inspiring projects.


I used a couple of Waltzingmouse stamps for my project, as they are our gracious sponsor this month, and as a WM fan I own quite a few stamps it seemed appropriate to play with them.  I stamped the large flower in two shades of versamagic chalk ink mixed directly onto the stamp, and did the same with the matching leaves - both are from the  Big Blooms set.  I layered the three sized flowers once cut out with foam pads and added a pearl in the center.  I used a MS punch on some plain brown kraft paper and added a sentiment from the say it loud set which I just adore as the different sized text makes it so versatile.  I embossed this with a pearly powder to match the pearls in both the flower centre and on the ribbon.

If you've not come across our challenge before, then its a little different, we ask you to play along, upload your card, then if you can spare it, and the cost of a stamp, you post it St Luke's Hospice and then I sell them at local craft fairs and all the proceeds go to the hospice - so far we've done 2 fairs and raised £335!  So you get to play, help and charity and can even win a prize :-)  If you join in the challenge this month, which runs until noon on 30th September, you could win a fabulous complete set of Waltzingmouse stamps which will be with the winner in time to create some great Halloween projects as the set we have this month is Wanda's Pantry:


I am also entering this into the following challenges:

Top Tip Tuesday's  - Shabby Chic
Make it Mondays link party- anything goes there every week
Scrapbook Sisters - anything goes
Totally Gorguss - as you like it


Thanks for visiting ;-)
Craftilicious x
Blogging tips