Showing posts with label christmas. Show all posts

Thursday, 8 November 2012

Birthday blogging

We've had a lovely day today - a nice steady morning of pressies and brunch, a trip to see the new Bond movie and then finished with a little "pre-nec planning" for my big birthday shopping trip tomorrow (having a birthday when the craft show is on is a bad idea for my wallet - and even worse for my husband!)  What better way than to end my celebration of entering my 40s than with a little light blogging so I have a couple of cards to share tonight........


First I had a play with the sketch from ISpy http://ispysketches.blogspot.co.uk/2012/11/issc40-with-julie-h.html  and combining it with this months washi tape challenge at Paper Crafts

http://www.flickr.com/groups/pc_november_2012_gallery_challenge/


I wove a couple of Christmas washi tapes I picked up from paperchase onto some scrap card and then die cut, matted and layered it.  I cut a sentiment on the cameo to stick on the washi tape focal point then used some black and white ribbon over an embossed piece of cardstock and added a red wooden star (John Lewis).  I created a washi tape frame on the card base and mounted the embossed piece on top centrally.
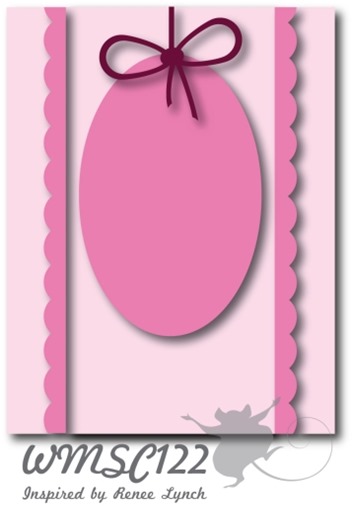

For my second card I got a little time to play with my new release bundle from Waltzingmouse using their sketch this week.  http://waltzingmousesketchchallenge.blogspot.co.uk/2012/11/challenge-122november-3-2012.html 


As cupcake craft are having a challenge this week using my favourite cardstock - kraft - I used that as my base card http://cupcakecraftchallenges.blogspot.co.uk/2012/11/cupcake-217-get-krafty.html  I stamped one of the new big background images from this months release using SU red ink onto a scrap piece of kraft and stamped the adorable sentiment oval onto the same card with the same ink cutting with a nestie label and matted onto deep red card.  I used the same red card to cut the border strips (PTI die) and finished with some red gems on the border and in the sentiment and a little red and white twine bow.

Right time to grab a little sleep so we can get up and get an early start for Birmingham in the morning - need my strength for stash shopping ;-)


Thursday, 1 November 2012

The Final St Luke's Challenge

Due to a number of issues in my personal life, I have had to take the difficult decision to close the challenge I set up to collect cards to sell on behalf of St Luke's Hospice - you can read the full details over on the blog  http://stlukescharitycardschallenge.blogspot.com/

We are going out with a bang however, with a bumper prize package worth over £30 and all you have to do to win it is create a traditional Christmas card.


For my card I used a reflections silhouette stamp and just added a little glitter and a gem - a very simple traditional card.


I'm also going to link this up to Ardyth's One Layer Wednesday challenge this week which is "Song in my Heart" so the song for this card has to "Away in a Manger".....

Thank you to everyone who has played along since the challenge started - you've all made a great difference to the hospice and for that I thank you greatly.

Tara
x

Monday, 1 October 2012

Simple Christmas for St Luke's

It's the first of the month again (already - just what happened to September????) which means a new challenge over at St Luke's Charity Cards Challenge and this month we are looking for CAS Christmas cards - well it is time to get cracking on those soon to be needed cards and simple is defo the way to go (for me anyhow) for Christmas cards so I can whack out a few in each design.


This is my case in point - it's been a hectic weekend so my card HAD to be CAS and very quick.  The bauble, complete with the word joy, was a design I found in the silhoutte online store and I simply cut it from white card stock and then coloured with a copic marker.  I added a simple circle of white glitter card behind the outline to give the bauble some weight and then added stickles to the word joy.  I cut a nestie shape to mount it on and drew around the outline of the die to cut a thin red border (the next size up die would have been too large for my 4 inch card base).  I finished by handing the bauble on some red and white twine with a matching bow.  I can definately knock out a few more of this design in different colours to make up a stack of cards ready for Christmas.......

I do hope you'll join in our challenge this month and get making your Christmas cards too - and if you're short on Christmas supplies you can even with a fabulous set of Waltzingmouse stamps as a prize if you're our winner so check out the challenge blog  http://stlukescharitycardschallenge.blogspot.com/


Saturday, 29 September 2012

Decapitated Elf....

Well I know Halloween is around the corner so I thought a gruesome title might grab your attention, but it's not quite as awful as it sounds!  It's my card for this week's CASology cue card inspired by the word "shoe".  I went for this cute pair of elf's legs complete with shoes but minus a body!  It's from the silhouette online store and cut simply from red and green card.


I turned the legs into a card with a punny sentiment printed on the computer in green, mounted with a slight overhang and finished with some red faux stitching.

http://casology.blogspot.co.uk/2012/09/week-12-shoe.html

Thursday, 9 August 2012

A couple of last minute challenge entries

It's been one of those weeks again this week with lots of hospital and Dr visits for the parents for me and my hubby so whilst I started a couple of cards for challenges earlier in the week, I've just realised that today is the deadline for them and I haven't blogged my entries!

So, here's the first - for this week's CASual Friday's challenge which was "something in the sky" http://cas-ualfridays.blogspot.co.uk/2012/08/cfc64.html  One of my most favourite things in the sky is fireworks!  I think its because bonfire night always heralded the start of my birthday (which falls a few days later) so fireworks have always felt like they were "just for me" since I was a kid and I've never grown out of that giddy feeling they give me.  When I picked up my issue of Craft Stamper on Saturday and saw the brilliant freebie stamp on it designed by our very own Lady of LIM Chrissie I immediately saw its firework potential.


I stamped the image 4 times in an "explosion shape" and embossed with white onto black card.  I die cut some stars from white glitter card in various sizes (the tiny bits are from a MS punch border actually) and coloured them with copics (they work really well on glitter so you can get it in any colour you need).  I added random dots of stickles in matching colours to the circles on the edge of the stamped image.  I cut a line just within the edges of the stamped image and cut round the bits that fell outside it to emphasise the explosion.   The sentiment was cut on my silhouette.

Next I wanted to make a card with this lovely sketch over at retro sketches. http://retrosketches.blogspot.co.uk/2012/08/good-morning-wow-wow-wow-did-you-see.html


I had some cute PTI stamps that I thought would work well so went down the Christmas route with the sketch and decided to use the blue and green palette which is the current Less is More challenge to go with it.  http://simplylessismoore.blogspot.co.uk/2012/08/week-79-colour.html


 The ribbon I used looks black in the photo but is actually a pine green with gold flecks.  I stamped 4 of the signs from the PTI Sign Language set in 4 shades of blue and green momento ink and cut them out.  I embossed an ice blue snowflake brad with clear pearl wow ep to give it a shimmer and make it stand out and arranged it over the snowflake sign so the flakes on the stamp were in between those on the brad.  I added some blue gems for sparkle and stamped a sentiment in ice blue but it didn't stand out enough so I wrote over the top with a blue glitter pen.


Tuesday, 8 May 2012

Flowers, stockings and peas........

I've had some extra time to play this week as I'm on holiday so I've done quite a few challenges so I have a couple to show you today.

Firstly I made a "white" flower for this weeks Make my Monday challenge http://mimchallegeblog.blogspot.co.uk/2012/05/mmm-week-48.html


The literal challenge was Lily of the Valley as it's this months birth flower and all I know about this flower is that it is NOT one of those!  I have no idea what it is, or what colour it should be, but I think it looks OK in white so lets go with it ok....   I just did very quick watercolouring with distress inks (bundled sage, forrest moss and peeled paint with a hint of spiced marmelade for the stamens).  I did use a tiny bit of  bundled sage on the "white" petals to give some subtle shading.  I used an embossing folder for the mount and cut it by hand after embossing and finished with a craftwork cards sentiment.

Next I made 2 cards using the great sketch this week at 52 Christmas Card Throwdown (I'm loving this challenge and have almost a full shoebox of Christmas cards already and it's not quite half way through the year). http://52cct.blogspot.co.uk/2012/05/sketch-challenge-5.html  I made one card with the sketch as is, and a second with it turned on its side.


For this first card I used my favourite Christmas pun stamp "peas on earth" coloured with copics, some paper from My Minds Eye 12 Days of Christmas and a fab greeting one of my local stores got made up so we can do localised greetings.


For this one, I turned the sketch sideways, used an old Magenta framed stocking stamp, stamped twice and paper-pieced the second layer of stockings in pink cardstock coloured with pencils to match the paper (same MME stack) and finished with a No Peeking sentiment from Waltzingmouse.

Right - off to get some jobs done.  Catch you later.


Saturday, 19 November 2011

Sundays with Chrissie Guest DT Spot


I am really thrilled today as I have a Guest DT spot over on Sundays with Crissy which is very exciting :-D  The challenge this month is to create a Christmas themed card or project in non-traditional Christmas colours - that is specifically to not use red or green.  I have a couple of Crissy's wonderful images that are Christmas themed and couldn't decide which to use so I decided to do both!

For my first card I printed her very jolly Santa on kraft paper and coloured him just using polychromos pencils from Faber Castel -eek no copics!  I usually use copics for skin and under colouring and finish with pencils for detail but as this was kraft paper I knew the copics wouldn't show up so had to go straight in with pencils.  I'm actually really surprised and pleased with the results - I didn't use sandsoder for blending either as it doesn't work on kraft so did any blending with dry stumps.


Once coloured I cut him out with a nestie and then used the same nestie sets to create a frame with kraft card.  I darkened the frame with a couple of shades of distress inks and added a pearl shimmer spritz for a vintage yet frosty feel.  I added some  DP from the My Minds Eye Signature Christmas stack to a 7 x 5 inch kraft base card.  The DP is mostly brown but has frosty white glitter and snowflakes so I finished the card with a snowflake cut with a large MS punch again from kraft and coloured with picket fence distress stain and some pearl smooch with a large pearl center.  The sentiment is a Craftwork Cards die cut.

As he's entirely in kraft - I'm entering him into the lovely Spotted Chick's That's Krafty Thursday challenge too.

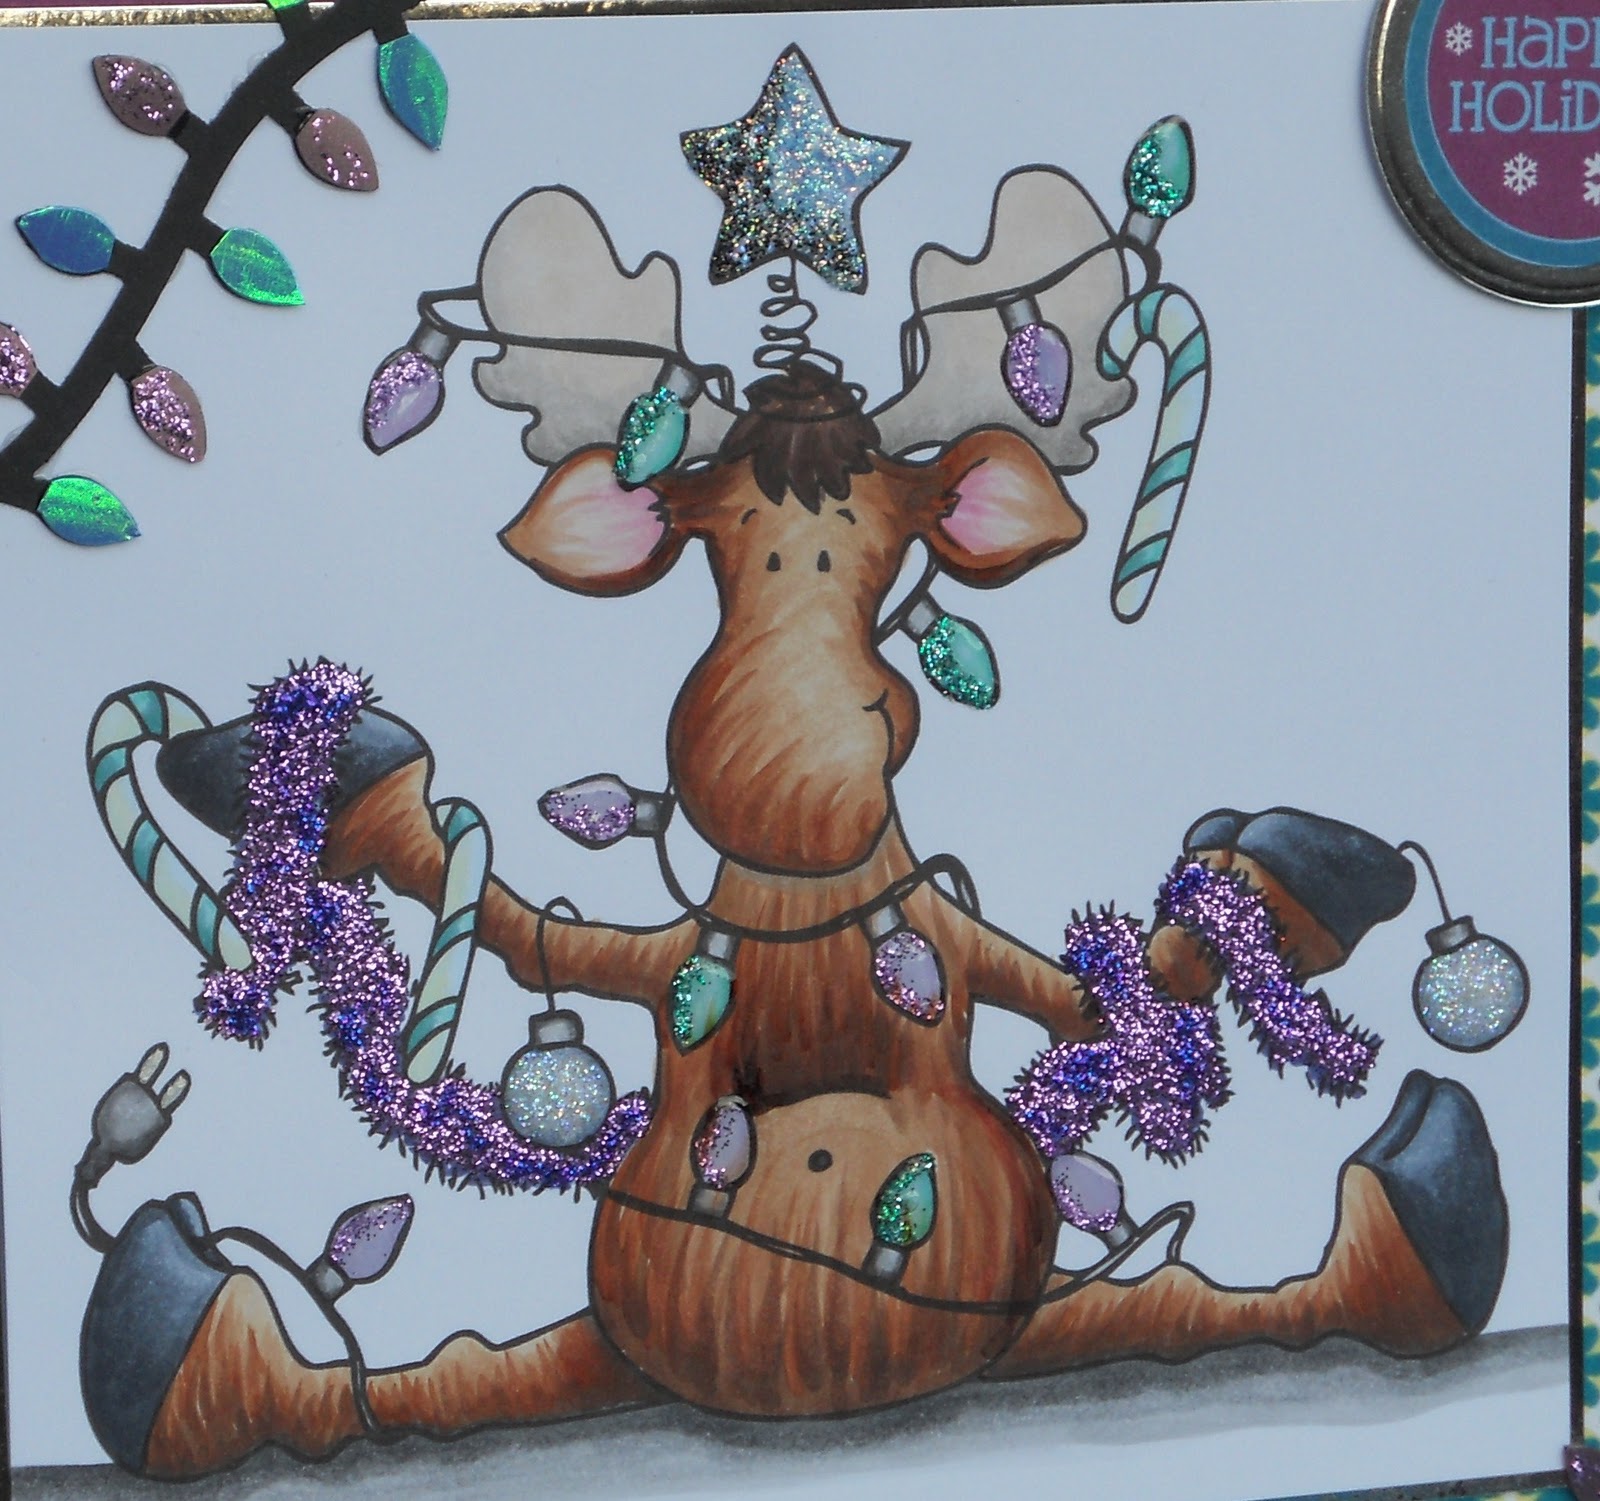
For my second card, I used one of my favourite ever images from Crissy - Mudzie Plays Christmas Tree - I just love Mudzie and the humour of the image.  This is a very large 8 by 8 inch base card, again kraft - I have a weakness for it can you tell ;-) so I printed Mudzie quite large to match - this is the joy of digi for me over rubber - you can decide on the size to suit your project.


This time Mudzie is coloured entirely with copics and to avoid the red and green this time I took my inspiration from the Happy Holidays sentiment which is cut from a DCWV paper stack and I went with purples and teals.  I had lots of fun creating Mudzie's fur so have done a close up shot below.  Once I'd coloured him, I added stickles to the tinsel to add sparkle and texture and added glitter and glaze to the baubles, star and lights.  The candy canes I feared would be difficult without red - but I think they work well in pale teal and are just mint flavoured instead of fruit!


The teal DP is an old 12x12 sheet so I don't know who it is by but its is rich flocked velvet.  The purple sheet on top of that is from the same DCWV stack as the sentiment.  I added a little silver mirri for Christmas shimmer and to echo the lights on Mudzie I used my MS lights punch on black card and then tried to punch it through the material they make sequins from but it got stuck :-(  I really wanted that sequin look however, so I drew round one of the bulbs MANY times and cut them out by hand....  It did take ages to do but I'm glad I persevered as it does give a lot of shine and shimmer as I'd hoped it would.

I've loved Guesting over with Crissy this month and hope you've enjoyed my shares - do pop along to this post and join in the challenge with your red and green free Christmas themed projects.

Thanks for stopping by today :-)
Craftilicious
x

Tuesday, 1 November 2011

St Luke's Christmas

For our theme over at St Luke's Charity Cards Challenge this month we decided to be easy on you after the dreaded "boys" cards that so many of you didn't like last month!  So our theme this month is a seasonal one - just make something for Christmas - any theme or style as long its Christmassy then anything goes!

Our sponsor this month is Lili of the Valley and they have kindly donated a pair of matching stamps from their super cute collection - I love LOTV images as they are great to colour.   We have these super cute mice making cakes and a pair of "recipe" sentiments to go with them as prize this month:


For my card, I decided to use one of my own LOTV Christmas stamps which I hate to say had not seen ink until now despite me buying in over 12 months ago!  It will be getting inked again soon though as its nice and quick to colour but makes a striking Christmas card.


I coloured her with copics and stuck mostly to Christmas reds and greens and just added some very pale blue-green for the snow along with a little glitter for that frosty sparkle!  The DP are from an old DCWV Christmas stack and the sentiment is cut from one of the DP sheets.

Now it's your turn - we can't see what you all come up with to get us in the mood for Christmas....

http://stlukescharitycardschallenge.blogspot.com/2011/11/christmas-is-coming.html

Craftilicious x

Monday, 26 September 2011

OLW Sentimental

Another quickie - on a bit of a roll tonight so sorry to overload your blog reader!

I haven't played along with OLW since it returned from its summer break, but I love sentiment stamps and fancied the challenge of doing them one layer rather than my usual approach of putting them in nesties with lots of ribbon and DP.  This is what I came up with - I'm in Christmas mode still as you can see:


Stamps are Waltzingmouse - inked simply in black and silver with a tiny spot of glitter in the centre of each snowflake.

That's all for tonight folks.

Tara x

Saturday, 13 August 2011

Christmassy Less is More

As it was so cold and dull yesterday, it put me in the mood for making Christmas cards, so I used my new waltzingmouse tiny trees set to create a Christmas card for CAS-ual Friday and I liked it so much, I've decided to use this week's one-layer inky theme at Less is More to do another.


I used a tiny 3x3 inch card - I really love these little cards - and masked off the top and bottom to create an inky background.  I used a blue cosmic shimmer, spritzed and dried with a heat gun so I could "blow" the puddles around to create interesting shapes.  Then I stamped the green tree teardrops by mixing two inks directly on the stamp.  I then stamped the two different length trunks and allowed them to dry.  I stamped the swirly stars in white and embossed with snowflake embossing powder.  I'm not sure if this is meant to be lights or frost, but I think the white works for either.  I finally finished with a simple sentiment, from the same stamp set, in one of the shades of green I used on the trees.

I'm also entering this into Secret Saturday challenge as their theme this week is Christmas is Coming and Crafty Hazlenuts Christmas Challenge which is one layer or simple this week.

I'll try to do something more summery later I promise as there is a hint of actual blue sky outside this morning!

See you later.
Craftilicious x

Wednesday, 30 March 2011

My First 2011 Christmas Card.....

Another really quick card and quick post tonight as I continue to get everything ready for our new charity card challenge - check out the link to find out more http://stlukescharitycardschallenge.blogspot.com/2011/03/new-monthly-challenges-starting-2nd.html

One of my DT for this challenge - Deborah  is also a designer for CR84FN and I've never played in their challenges before so I thought it was time I played along.  The wanted a card with the colours of garnet chartreuse and cream and for some reason, even though its March, just lead me to think Christmas!  So this is what I came up with:


The base card is cream, the garnet strip is handmade paper with gold, red and cream stitching, and the chartreuse circle is from Craftwork cards, embellished with some garnet gems.  This is the challenge site if you want to play along http://cr84fncolorchallenge.blogspot.com/2011/03/cr84fn21.html.

I used the lovely CAS sketch over at Less is More for the basis of my design - my second entry in this weeks challenge as I love the simplicity of this sketch  http://simplylessismoore.blogspot.com/2011/03/week-8-sketch.html

I am also entering into the Christmas in Spring challenge over at the Secret Crafter Saturday Challenge http://thesecretcraftersaturdaychallenge.blogspot.com/2011/03/challenge-127_26.html 

See you all Saturday for the first St Luke's Challenge -eek getting nervous now ;-)

Craftilicious x


Thursday, 30 December 2010

Book Group Christmas Dinner 2010

I started this post much earlier in the month, but have been down for a couple of weeks with a chest infection (early unwanted christmas gift!)  It was our annual Christmas dinner for bookgroup in early December and all the ladies bought me this gorgeous Christmas table centre as a thank you for hosting book group and feeding them throughout the year.  Isn't it beautiful?  I just love the colour combination of the lime green orchids, the red roses and the gold leaves.  Thanks ladies :-)  (It even stayed fresh for Christmas day!)

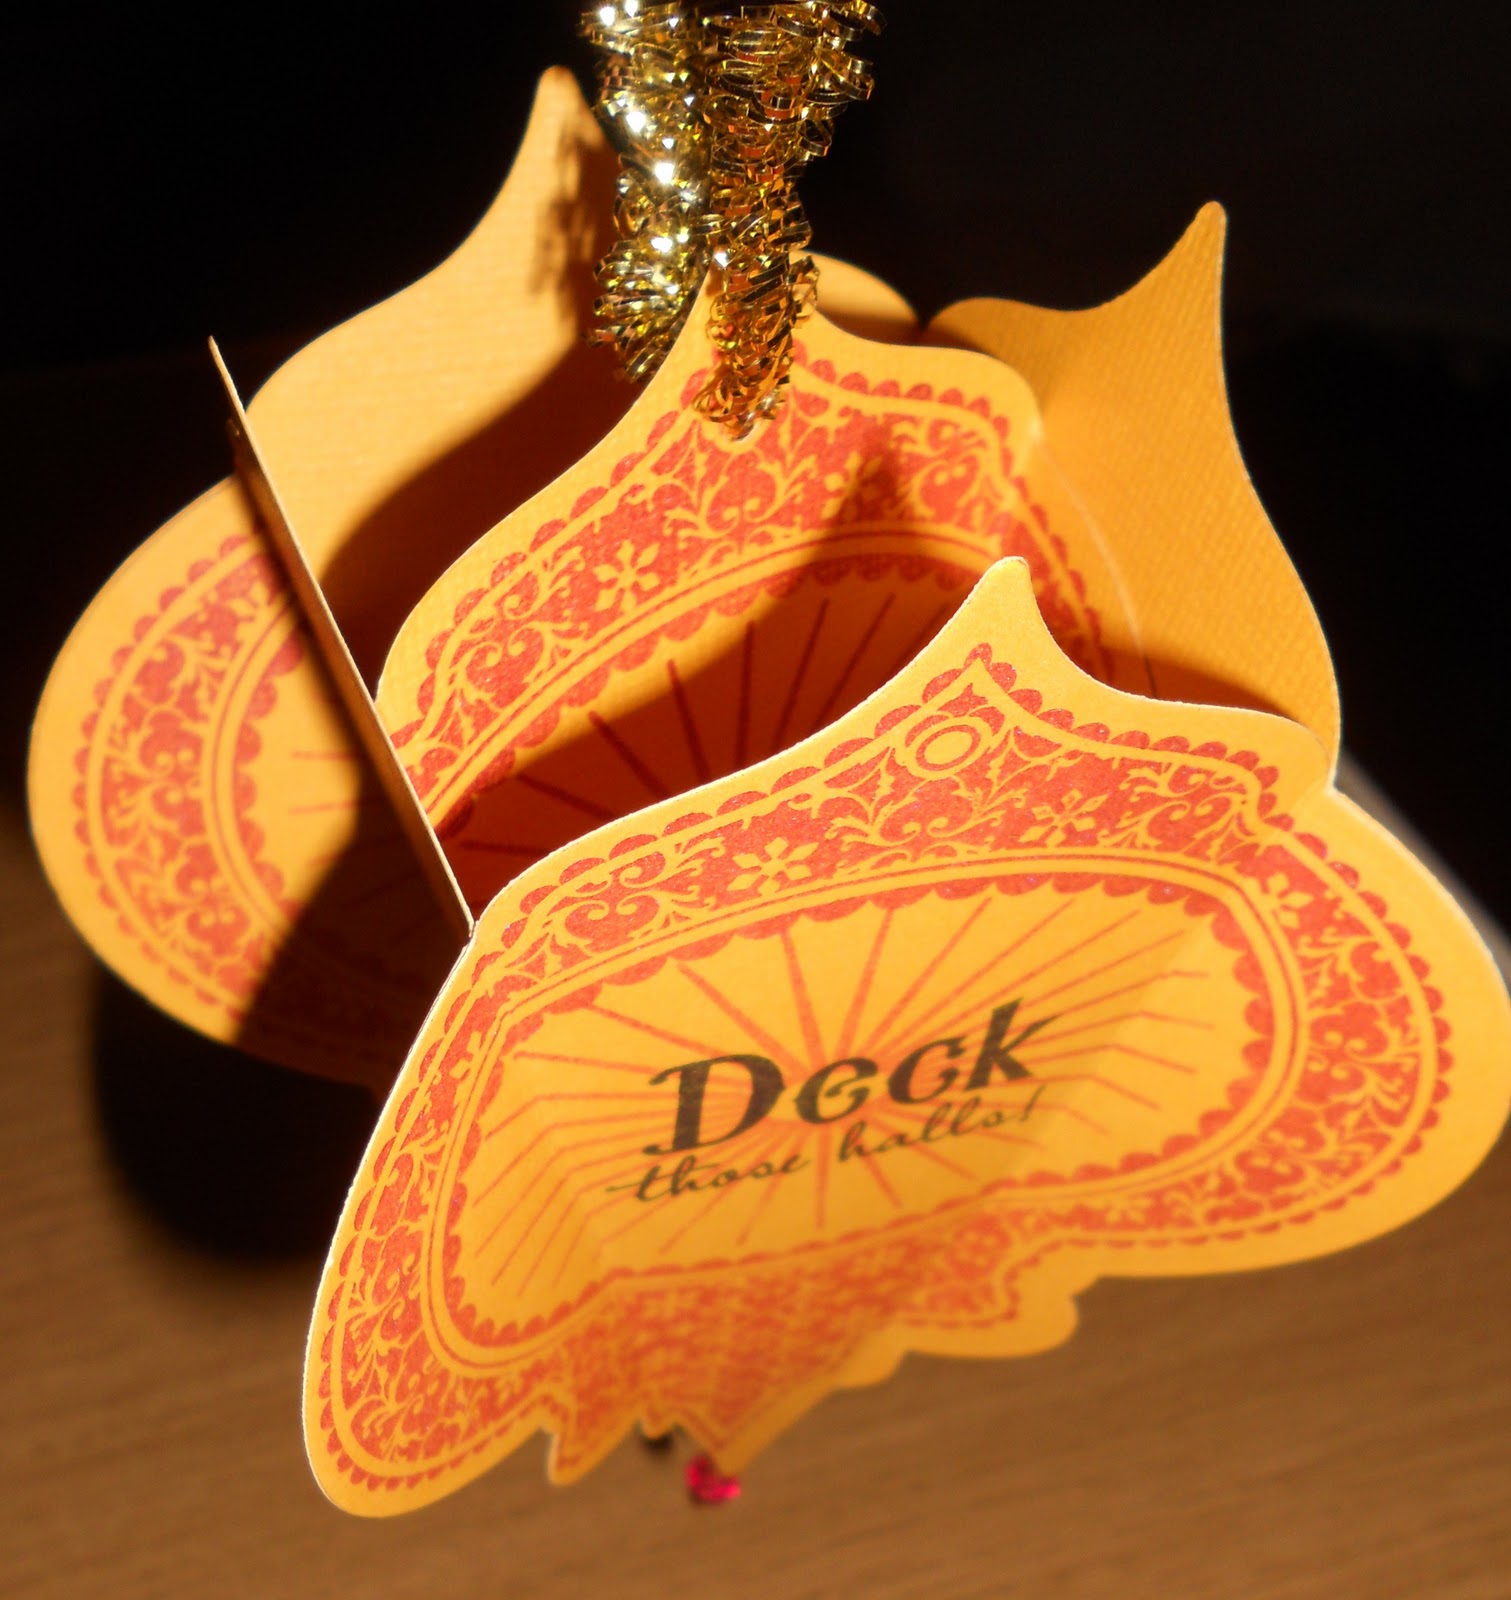
I always make the ladies something crafty, either to put in a cracker or as a table decoration that they can take home with them.  This year I made paper ornaments using my delightful new stamps from Waltzing Mouse which fit perfectly in the traditional ornament nestability.  I love these vintage style ornament stamps and I stamped 5 to make each decoration into a sort of bag to hold some candy canes and the second hand-made gift of a badge. 


I saw this sentiment on something earlier in the year and thought it would make a great badge - appropriately worded for a group of busy readers....  I rolled out some sculpy, stamped the sentiment into using an Elzybels alphabet stamp.  I covered with glossy accents once baked and added christmas tinsel glitter to the edge.


Dinner itself is always the traditional turkey with all the trimmings, but one of our ladies turned veggie this year, so I had to come up with a vegetarian option for her and I have to say, I wanted to eat it myself so I thought I'd share it with you.

To begin with I peeled and cubed a small butternut squash and pan roasted the cubes along with diced onion, and diced courgette.  I added cumin and a little alfez lemon stir fry paste for warmth and flavour.  I dry roasted some cashew nuts and then blitzed half of them with half a pack of pistachios - I wanted to leave some for texture and crunch but wanted the ground up nuts to form a mortar to hold the dish together.  Finally I stirred through the remaining nuts, a pack of cubed feta, lemon zest and lots of fresh parsley. I would have added a few diced apricots ideally but my vegetarian friend doesn't like dried fruit.  The resulting mixture can be seen below.


I arranged 6 feuille de brique sheets so that they overlapped to form a rectangle, brushing each with butter to make them stick together.  If you can't find feuille de brique, filo would be a prefectly good substitute, but I would make sure I used more so that it was double thickness everywhere as the brique sheets are stronger and less likely to tear than filo.  I put the filling in the middle, rolled and put seam side down on a baking sheet.  I brushed the top again with butter and sprinkled with sesame seeds and baked in a hot oven for 15 minutes until warm throughout and crispy on the outside.  It went down a treat with the vegetarian guest and was also pretty decent cold for lunch the next day. 

Wednesday, 1 December 2010

It's Snowing!


Snow is definitely the theme for today, so I've decided to enter one of my favourite Mo winter images which is now also available in rubber from Stamping Bella into the weekly Bellarific Friday Challenge which is "snow" this week.


The door is coloured in pencils and blended with sansoder and blending stumps.  I used Linda's towel technique using lots of dots in various shades of green copic markers to colour the actual wreath.  Red stickles for berries, and white stickles for the all important snow finish the look, along with a little bow from my stash of ribbon.  The background papers are both from the DCWV Christmas Stack.

We've already got the worst snow Sheffield has seen in 30 years, and its still falling.  The cat has cabin fever and much more of this and we'll not be far behind her!  Keep warm everyone and get the soup on!
Blogging tips