Monday, 14 February 2011

Outside the Frame

Today I decided to play with one of my new Tildas - as soon as I saw that great big fluffy bow on her head I knew I had to have her - I'm loving the bloomers too!

She is coloured with copics, cut out with a nestability and set off centre on another.  The background papers are from the Basic Grey Wisteria pad.  Some co-ordinating paper roses and a bow finish her off.


This is another one of the images I used to practice hair colouring - the tops work, but I need more practice on the long and flowing bits.


Over at top tip Tuesday last week, they showed you the technique for having bits of your image outside of the frame when using nestabilities.  I've done it a couple of times before but forgot how much I liked the effect, so I had another go at it so I am entering the card in their challenge this week.  http://toptiptuesday.blogspot.com/2011/02/top-tip-21-outside-frame-tutorial-frame.html

Over at Just Magnolia they had a sketch, which was rather a complicated one, and this is my interpretation of it.  http://justmagnolia.blogspot.com/2011/02/week-93-minas-sketch.html 


Thanks for visiting....
    Craftilicious x

Saturday, 12 February 2011

Kraftin Kimmie Challenge

This is week two of my efforts to gain the April GDT spot on the Kraftin Kimmie Design Team.  To play along check out this blogpost

The challenge this week was a recipe - 3 main colours, 2 designer papers, one ribbon, one button.  I decided to pick my papers first and take the colours from them.  I selected a lovely floral from the My Minds Eye Pretty Please pad and selected 3 matching copics to colour my image with.

I ordered a load of new stamps in Kimmie's Birthday sale last week, and unbelievably, they made it all the way from Canada and arrived this morning :-)   It was hard choosing which to colour first but I plumped for Nadine.  I flat coloured her dress in the copics, then overshaded with matching tones of pencils for added depth.

I used the teal colour to match the second paper, also from the same paper pad, and also for the ribbon and button.  I tied a double bow on the wonderful bow easy, and tied a polka dot button into its centre.  Some colour co-ordinated sizzix corners and a few gems tied it all together.


I've been practicing hair colouring this week - think I'm finally getting where to put the highlights!


The challenge post for this week can be found here http://kraftinkimmiestamps.blogspot.com/2011/02/challenge-65-recipe.html  and the DT's have used the AMAZING new stamps from Annie - don't you just luuuurve that Grease theme???   I know what I'll be doing tomorrow...........


Thanks for visiting....
    Craftilicious x

Monday, 7 February 2011

Valentines are Red

Whilst I was still in a romantic mood in the run up to V-day next Monday, I decided to ink up a new magnolia stamp - tilda with lots of hearts - isn't she a cutie??? 

I used a mix of copics and pencils to colour her in, with some glitter on the hearts.  I double mounted her with a lables nestie, and did the same for the matching sentiment which came from an Elzybels set.  The card background doesn't show too clearly but its a DCWV hearts embossed 6x6 card.


Here's a close up which shows the colouring in a bit more detail.


There are still several valentines challenges around this week so I am entering the following:

http://cupcakecraftchallenges.blogspot.com/2011/02/cupcake-128-seeing-red.html - Red
 
http://thesecretcraftersaturdaychallenge.blogspot.com/2011/02/challenge-120.html  - Valentines

http://allsortschallenge.blogspot.com/2011/02/wk89-it-must-be-love-love-love.html - Love Love Love

http://cutie-sunday.blogspot.com/2011/02/cutie-sunday-130-06022011.html - Hearts

http://magnoliadownunderchallenges.blogspot.com/2011/02/magnolia-down-under-challenge-82.html - Love

http://pileitonchallenge.blogspot.com/  - Bright and Breezy

Thanks for visiting....
    Craftilicious x

Sunday, 6 February 2011

A Chance to Be A Krafty Girl

As well as having a fabulous Birthday sale last week, Kimmie over at Kraftin Kimmie announced a competition to become a Krafty Girl and join the design team as a guest designer for the month of April.  This is a chance I just can't pass up.......

To be entered, you have to participate in each of the weekly challenges throughout February, and the first challenge posted yesterday was "Seeing Red" - you had to use red on your card somewhere.  I decided to use Monique and she just scream "red" to me - she's a sassy little gal!


I decided to make a step card, in black to go with the red for added drama, and I used an Alota background stamp to make a theatrical backdrop which was coloured with copics, then I masked off the curtains, painted a spotlight with shimmer paints, and over blended with distress inks.


I coloured Monique herself with copics and mounted her onto thick white card to provide some extra strength before cutting her out.  I added some stickles for sparkle to her bodice and a gem necklace and another on her hat.  She comes with a cute sentiment which says "when in doubt, dance", but I wanted a larger sentiment to fill the side of my step card, so I decided to use a Stempleglede stamp which I thought matched the confident stance of Monique.


I'm not sure how clear the image is to read, but the sentiment says "Go confidently in the direction of your dreams.  Live the life you have imagined"   So I am confidently going to imagine myself winning the guest designer spot......   ;-)

http://kraftinkimmiestamps.blogspot.com/2011/02/challenge-64-seeing-red.html

Thanks for visiting....
    Craftilicious x

Friday, 4 February 2011

Under the Sea...

I wanted to colour my mermaid stamp from Kraftin Kimmie so thought I'd use her to enter their weekly challenge.  This week it was "reduce, reuse and recycle" and it caused me a few headaches as I couldn't think of anything to reuse or recycle, UNTIL I cleared the craft room out this week that is.  I had the topper I made for my cupcake tower for our wedding anniversary/reception which is a couple of years old now and the feathers had gone a bit tatty, so I pulled it to pieces, and re-used and recycled one of the ribbon diamante flowers from it and used that under the bow - the very first successful bow I've tied on a card, thanks to my new magic bow-easy tool :-)  Here's a picture of the tower with the topper intact so you can see where my recycled item came from.


On Nerissa, I've done the colouring with copics, but then I wanted her scales to shimmer, so I dug deep in the back of my drawer and dug out my LuminArte paints.  I liked the effect on the tail so much I overpainted her hair with a yellow shimmer too - the photo doesn't do it justice but the effect in real life is very cool I think!  The craftwork cards sentiment got the same painting treatment and a few pearls finished it off.

If you like the image, and get on over to the Kraftin Kimmie website today, she's having a special birthday sale with 40% off...........  but hurry the sale ends today!!!!

Check out their weekly challenge every Saturday here

Thanks for visiting....
    Craftilicious x

Wednesday, 2 February 2011

Auntie's Easel

I made this card for my Aunt's Birthday yesterday.  I wanted to do something different for her, so I decided to make an easel card as I'm not sure she's ever seen one.


I used a lovely Hanglar girl with a fab floral headband and mounted her onto some DP which I punched with a PATP from Martha and mounted onto some colour-matched card to make the pop up element for the easel.  I added some flowers and hid the wires between the layers and finished with a metal butterfly brad that dangles and flutters.  There is a close up shot below.  The Happy Birthday is from a Stempelglede set, and the just for you is a new "mini cling" but I forget the brand name - sorry - currently in Hobbycraft for a £1 each.


It fits a couple of themes for challenges so is entered as follows:

Papertake Weekly  - Anything Goes + Flowers

Res-Q Challenge - Get in Line - your project must have a straight line on it - and my line of punching is on lined paper so I think that counts twice ;-)

Top Tip Tuesday - Girlie - can be anything girlie this week and this certainly is :-)  Loving their top tip this week to create a banner from ribbons - lovely idea.

Thanks for visiting
        Craftilicious x

Tuesday, 1 February 2011

Lace and Dots

I've had a busy week at home making cards and sorting out my craft room so I've not managed to blog for a week.  Here's the first of the creations to show you.


I made this card for a colleagues birthday on some new 7" x 7" cards so a little larger than I have worked with before which gives you scope to put a little more on the cards I found.  I started with two layers of complementary papers (sorry not sure what stacks they are from) and used my Martha Steward "Scroll Lace" punch-around-the-page set on both layers to give a doily effect.  Some complimentary double mounting popped the image off the background, and I used the "waste" from the corner punch to add decorative corners to the image.  Some fabric flowers with pearl centre and a craftwork cards sentiment colour matched with distress inks finishes it off.

The image is a gorgeous pair from Hanglar (sorry no link as website only works in Sweden), which was coloured completely with Faber-Castell pencils and blending stumps - no copics even as a base.  I was trying to emulate one of my colouring heroines - Paulabella - but I need a lot more practice - just wish I was stateside so I could do one of her classes :(  I do love the effect on the boys hair though, that came out better than I get it with copics and I think the blending makes his waistcoat look like leather.  I've done a close up shot so you can see the detail a bit more.


This card fits the following challenges this week:

Going Dotty - over at the Just Magnolia challenge blog

Punch It - is the challenge this week at the Pile It On Challenge  where you have to enter at least one other challenge to enter their challenge (they also helpfully list a lot of other challenges so good if you're browsing for something to do)   There is definitely a lot of punching going on on this card!

Layer it up - is the name of game at Paper Play Challenges and this card has 5 layers so fits that challenge perfectly.

Flowers - are the requirement at Fun at Fairy Knoll so I'm entering their challenge for the first time too.

Scallops - are the in vogue at Some Odd Girl and there are lots of scallops with my punched layers.


Wednesday, 26 January 2011

You're Special To Me - Double Challenge

I found another new blog challenge this week over at Annabelle Stamps - and discovered that as well as their weekly challenges, they do a monthly sketch challenge, and its possible to combine the two.  I liked the idea of this weeks challenge, as it was to "say it with emboss resist" and I haven't used my embossing powders in an age.  I used one of the gorgeous sentiments from Stempelglede and embossed it with clear matt powder.  As I was also going to use the monthly sketch from the same blog as the basis for the card, I stamped it into the centre of a nestie circle, leaving the nestie in place, and then used two shades of distress inks (bundled sage and crushed olive) to blend a background whilst maintaining a white border.  I mounted onto another nestie, some gorgeous glittered paper from the laundry line stack from My Minds Eye and added a flower and a few gems to match the shape of the sketch. 

 
Its turned out to be my favourite card of the year so far.......

The challenges are - Annabelle Stamps January Sketch Challenge and Annabelle Stamps Say It With Emboss Resist

Tuesday, 25 January 2011

Happily Ever After

Over on Kraftin Kimmie's blog this week - the challenge is to create an image with a fairytale theme.  As my husband recently won me the Prince Charming stamp in the Dudes challenge and it arrived in the post yesterday (thanks Kimmie!), I thought it would be churlish of me not to use it to enter the challenge.  I also have the Rapunzel stamp, so I decided to team them up, along with a Magnolia background castle window stamp, which I repeated to create a tower for Rapunzel to let her hair down from.


I'm not overly pleased with the colouring, it came out a bit muddy with the trees I think, but I do love the concept so am blogging it anyhow.  I stamped Rapunzel twice, and cut her out so I could get just her arms out of the window, and used two lengths of her hair to get it to the bottom of the tower.  The vines around the tower were created with the wisteria set of tapestry stamps.

Over at the Saturday Challenge, they want you to use two people on your card, so I am entering their "its a couples thing" challenge as well.

Friday, 21 January 2011

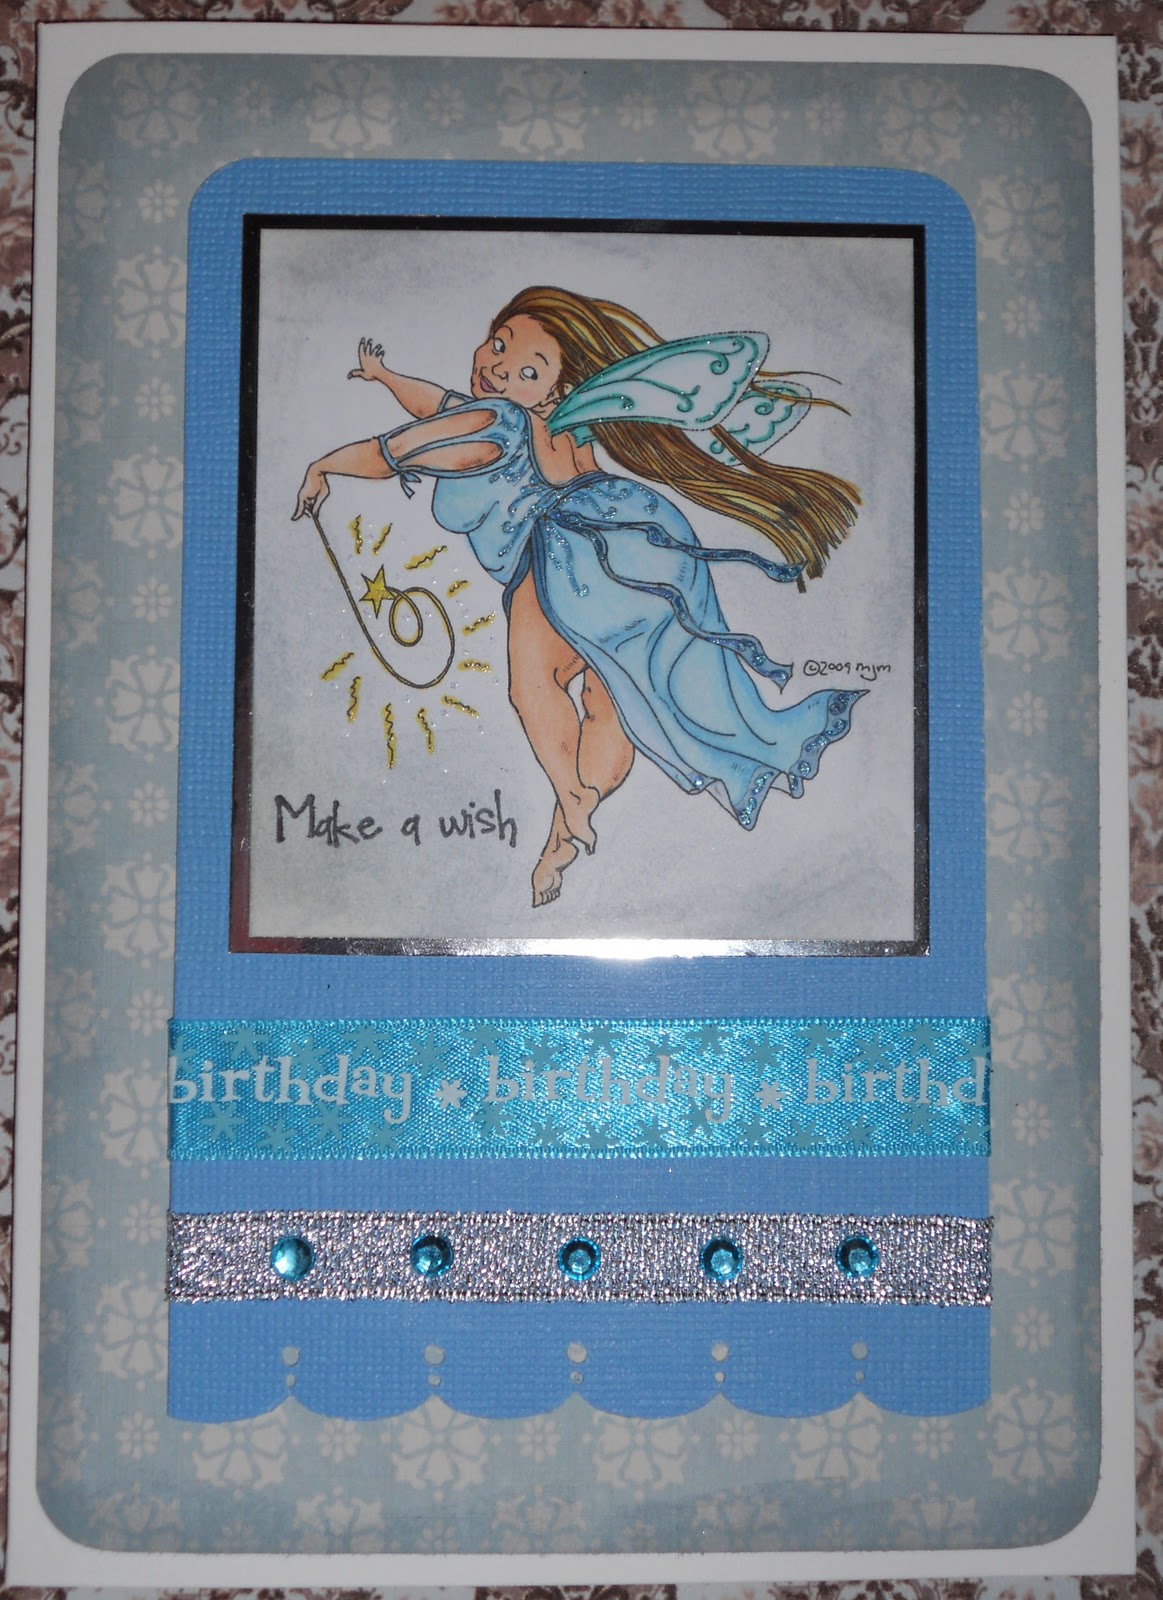
Birthday Fairy

I knew I had to colour this image as soon as I first saw it on Mo's Digital Pencil.  I made this card for a friend, who as we were best mates as teenagers, and she is very much taller and thinner than me (not hard on either score lol!) always affectionately called me, 'her little fat friend'.  So I thought I'd send her a big fat fairy to wish on for her birthday!

The image is by Mo Manning and she's a delight to colour with all her voluptuous curves!  I coloured her with copics, distressed the edges of the card I printed her onto with Ranger distress inks in weathered wood, and added the swirly details to her dress and wings with sakura glitter pens.

The DP is from Ella Blue by GCD Studios again - I just love this stack.  I distressed the edges after cropping the corners again with weathered wood.  I mounted her onto some blue card stock (with a mirri layer inbetween) and added a couple of rows of ribbons and some blue gems for added sparkle. 


I'm entering my card into the following challenges:

ABC Challenge - M is for Magic well fairies are definately magical!

Cute Card Thursday - 1, 2, 3 Recipe - I have one image, 2 ribbons and 3 layers of paper.

Flutterby Wednesday Challenge - Open Week - just has to contain a butterfly, fairy or angel.  :-)

Creative Craft Challenges - Monochromatic Madness - it is all shades of blue except for the flesh tones so I think it counts ;-)

Thursday, 20 January 2011

The Big One

I made this card for my husband to give to a friend who turned 60 this week - he's really into fishing so I hit upon the idea of having him catch a "60" on his hook as a different way of getting the number on the card.  I'm quite pleased with how it turned out.

The character stamp is a Magnolia and I made the scene using the Alota stamps winter pond scene but I only inked up the pond part and then added grass using my faber castell pencils to cover the gaps under his little jetty.  The DP is from Papermania - their new Birdsong pack - this particular one has a basket weave look to it, so I thought it went with the theme of an old fashioned fishing tackle box.  I used my EKSuccess "swiss cheese" border punch to create a decorative strip of "bubbles" down the side.


As he is mostly green, very cute and the "gone fishing" sign is a brad, then he fits the theme over at Cooking It Up With Katie so I'm entering their challenge again this week.

I'm entering Let's Ink It Up - Anything Goes as well

The Creative Card Crew want mens card this week so it fits their theme also.

Saturday, 15 January 2011

Forget the Prince....

.....It's all about the shoes!

I made this card for my friends birthday today - like most of my girlfriends (well like almost every girl everywhere really!) she has a thing for shoes so I thought this image was just perfect for her.  Cinderella comes with the matching sentiment and the obligatory shoe.

The paper is from Ella Blue by GCD Studios a gorgeous double sided paper stack in shades of blues and browns.  She is coloured with copics and stickles for added sparkle, and mounted onto grey card and silver glitter paper.  The large blue flower is an old making memories pack, not sure its still available - it had a pink centre which didn't match so I covered it with a Craftwork Cards birthday circle sentiment.


As this has a flower on it, it qualifies for this weeks challenge at Kraftin Kimmie's blog - Kraftin Kimmie Flowers Challenge

The teal blues and browns also qualify it to enter in the  Allsorts Challenge Blog

I'm also entering it into the Stamp Something challenge which is "anything goes"

A Card For Katie

Katie Renz, an American crafter and blogger, is unfortunately, quite ill with stomach cancer at the moment, and this week over on the the color throwdown blog  they are asking not only to make a card using pink, brown and blue, but also, to send the card you made to Katie to cheer her up after her chemo.


I used Elzybels (shop now closed so no link, sorry) fairy stamp and coloured with copics in the colours for the challenge.  I struggled to find patterned papers in my stash that fit the colour theme and weren't too fussy when used together, so I opted for mostly plain or mottled papers in the colour themes, and I embossed the pink with an embossing folder.  Some glitter, paper lace and ribbon with a brad finish it off along with a handwritten sentiment.

My card is in the mail, winging its way across the Atlantic - hope it brings a short smile in a very hard time for Katie.

Some digi-stamp artists have grouped together to put a wonderful kit of stamps together and the proceeds from the sale are going to help Katie - you get great stamps and a great price - Katie gets some much needed help - it's a win-win if you ask me so head on over to Jak Heath's website to take a look at what's on offer!

I'm also going to enter this into the Cooking it up with Katie - Pink Embossing Challenge 

Friday, 14 January 2011

Sprinkle Stardust

This card is for a friends birthday which is today - so Happy Birthday Linda!  It's the first time I've tried the masking technique to get a background image behind a character - I've used backgrounds before, but I've cut the character out and stuck them on.  My alignment was slightly out, so she's not quite sitting on the wall properly, but it's close enough for it not to have ended up in the scrap bin.

I love this image, with all the glitter, and the sprinkle stardust sentiment is just right. (sorry not sure where I got this stamp again - I must try harder to note down when I buy stuff!)  I coloured the image with copics and added definition, particularly to the grass which is a bit thin for copics, with my Faber & Castell Polychromos Artists Pencils (unfortunately I don't have this great big beautiful box, just a handful of individual ones)  These are great pencils which blend really well with sansoder.

The Happy Birthday sentiment and the bird on a branch are both Elzybels stamps, which are no longer available so no link - sorry.  It was quite refreshing to go straight onto a card without any background papers for a change.


As this is my favourite Magnolia image, in no small part due to the fact that it requires you to add lots of my favourite embellishment in the form of glitter for the stardust, I am entering this card into the My favourite things challenge on the Just Magnolia & Hanglar and Stanglar Challenge Blog

Thursday, 13 January 2011

Surprise Package

I made this card for my nieces birthday - it's actually a Christmas Magnolia image, but I think she works well as a birthday surprise too.  The little banner is a Magnolia stamp too.  The sentiment is an Elzybells stamp, but unfortunately Elzybells has closed its doors so this is no longer available to buy I'm afraid.

As usual, she is stamped on smooth white card and coloured with Copics.  I'm not sure what the DP's are - they were in my "pile".  Martha's loop border punch and a bit of velvet ribbon add some extra detail.  (sorry about the dodgy photo - this was taken before I learnt how to clean the lense!)


I've just found a challenge blog which is new to me, which used only to do the ever-so-hard-to-obtain Hanglar and Stanglar stamps, but now they've added Magnolia's into the mix, so I'm going to do a last minute entry into their Anything Goes challenge

Wednesday, 12 January 2011

Classy & Fabulous!

One thing I am determined to do this year, is to actually use some of the craft stash that is currently overflowing out of my very large craft room (I am such a lucky lady to have SUCH an understanding and uncomplaining husband - mwah to you Mr C!).  So in the spirit of this, I'm starting the year as I mean to go on, by not only making cards for the special peeps in my life, but also just for the hell of it!  And what better way to achieve this than by entering the many challenges that exist out there in blog-land.

So this gorgeous little lady - Samantha from my favourite Moonlight and Whispers range at Kraftin Kimmie is being entered into two challenges this week:
  •  And as she's a Kraftin Kimmie image and as I used no ribbon, she also qualifies for the Time to Unwind challenge too.
The image is stamped on smooth white card stock (I use A4 sheets from Rymans - its economical but great for copics and pencils with sansoder) and coloured with copics - she just had to be a red head ;-)  I mounted her onto a scrap of sparkly blue paper, embossed with tiny stars, and added a bit of spotty red foil (which was actually the bottom of a Christmas card I trimmed off before recycling).  I added a paper punched strip of pearly white paper with one of my Martha Stewart punches and a suitable sentiment - I'm really sorry though I can't remember where I bought this sentiment set from.

Happy Birthday SugarBowl!

To celebrate their second birthday over on the Sugar Bowl they are having a special challenge with two great prizes.

There was a sketch to follow, plus the additional theme of  "embossing" so I made this card to play along.


I used "A Little Hug" by Leanne Ellis, and coloured with pencils blended with sansoder and blending stumps.  The embossing is the Damask embossing folder from Crafts Too.  I used my Martha Stewart branch punch on some white vellum and also added some flower brads to match the sketch.

Happy Birthday Sugar Bowl!

Monday, 10 January 2011

Strut Your Stuff!

New Year, new stamp.  I got this gorgeous Kraftin Kimmie "Vivienne" stamp for my birthday back in November, but I haven't had chance to colour it in until now.  I thought she would be just perfect for my friend whose birthday it is in January, so I coloured her in with copics, and made her blonde to match the lady in question.

I added a little sparkle to the feathers and necklace with stickles, and popped her onto a background paper from my My Minds Eye Laundry Line which is one of my faves.  Unfortunately the image is unclear as apparently "I don't know how to clean my camera lense..."  Other half does though so hopefully photos from now on will be a bit better (Unfortunately I'd already given the card away before he pointed out the error of my ways!)

As this is a new stamp, it fits the theme this week over on Cupcake Craft Challenge - Something New so I am entering my card into their challenge for the first time.

Sunday, 9 January 2011

Skaterboy!

This card was a custom design for a friend for her grandson who is currently mad on skateboarding.

I used The Greeting Farm's Skater Ian stamp and coloured with copics, then I made an urban background.  A sky blue paper, layered with grey and beige offcuts at the bottom to make the road, then I cut strips of pale grey and beige to make skyscrapers.  I made windows by just dabbing the chisel end of my black copic in rows.  I finished it with a ramp for him to jump over.

Wednesday, 5 January 2011

Kraftin Kimmie's Dudes Challenge

The challenge over at Kraftin Kimmie's blog over the holidays was all about the "Dudes" and it was an intriguing one, not only did the image have to feature one of Kimmie's dudes, but you had to get a dude in your life to make the card!  Yes, you had to share your stash with a boy!!!!!!

I thought it sounded like a fun way to spend New Year's Day so I decided we'd both use the same stamp and see what we came up with.  I decided we'd use Willard and get a head start on next years Christmas cards....  Can you tell whose is whose?  I was hoping it would be easier to spot mine, but it turns out my other half took to my copics like a duck to water - I may have to find a hiding space for them!


In case you were still wondering - mine was the blue version......

Blogging tips