Showing posts with label waltzingmouse frame it. Show all posts

Saturday, 3 May 2014

Waltzingmouse Parrots

We have a fabulous new colour theme at Waltzingmouse Fanatics this fortnight based on some bright parrots  http://waltzingmousefanaticschallenge.blogspot.co.uk/2014/05/challenge-17-colours.html


I was drawn to the purple and orange so decided to take artistic licence with the apple blossom in this seed packet design and I know it's mostly white or pink but we can paint it any colour we like now can't we that's the fun of stamping!   I wanted to do a little watercolouring ahead of the online class I'm taking from Monday so I can see if I've improved by the end of the class ;-)

I added a sentiment from "Frame It" on a green banner to finish it off and bring in more of the colours.

Do pop along and join in the challenge  http://waltzingmousefanaticschallenge.blogspot.co.uk/2014/05/challenge-17-colours.html


Tuesday, 18 June 2013

Waltzing in the sunshine?

So, it's waltz day over at Waltzingmouse Makes and this month's theme is summertime fun  http://waltzingmouse.blogspot.co.uk/2013/06/june-blog-partylets-have-little.html and I think Claire must have decided on this theme a while ago as there certainly hasn't been much sign of summer on this side of the pond so far this year!


Like many people who've linked up already, I naturally turned to My Island as my set to play with when thinking of sunshine and summer and I decided to use it to make a first anniversary card for my friends who got married in the Caribbean last summer.  I stamped the sunrise with 3 colours of ink onto a scrap of yellow card and then added some silhouettes from the set in black.  Once I cut it out, I selected some blue DP for the background and stamped the palm trees onto it so I could line them up with the yellow scrap so the trees were spilling out of their frame.   I distressed the edge of the blue paper with my ranger tool and then added versamark ink and yellow embossing powder to add to the beachy feel.   I finished with an anniversary sentiment from the Frame It set.

Let's hope that a gallery full of summer images persuades the sun to make an appearance this week.....


Wednesday, 24 April 2013

Waltzingmouse Flower Show

Claire came up with a brilliant idea following this month's fabulous new Waltzingmouse Stamps release of continuing the floral theme from this months Blog waltz into a CASE competition http://waltzingmouse.blogspot.co.uk/2013/04/flower-show-case-comp-open.html

Me being me, I couldn't choose one card to CASE from the delightful array on offer from the special flower show team, so I decided to combine elements from two designers into one card.

I CASEd Aneta's background and layout and added Kimberley's big flower and glossy leaves:


and after 2 attempts and a recycling bin full of failed scraps,  (all I can say is that the lovely delicate border from Nordic Winter is not a pretty alternative to stitching when stamped in thick black over all the edges of your DP!  One of these days I'll remember to test stamp on something other than the original.....) I came up with this which is perfectly timed for my Mum's birthday tomorrow:


I started with the lovely digi papers Claire released to match the Folk Art Flower sets and printed off an A4 version in 4 colours.  Now this is where I went slightly off-piste with Aneta's card and why my first went in the bin.  I have a symmetry OCD and whilst I didn't spot it on the original, when I placed my pieces on the card I noticed that the sides didn't match - it freaked me out and I just couldn't handle it.  So I printed more (the beauty of digis you never run out!) and this time I added an extra "triangle" to the middle so I could have perfect vertical symmetry and everything became right with the world again (until I screwed it up with thick black yucky lines....)   So for attempt number 3, I took the little stamp from Classic Oval Frames and stamped and embossed it in white where the DP's joined to give me the feel of stitching from Aneta's card - much better than the yucky black!  Here's a close up so you can see how it adds such a pretty soft detail:


I cut a doily from white vellum with my cameo and then set about cutting a couple of different 3D flowers from shades of pink and orange paper again on the cameo - layered up with a brad fixing which is covered with a big blob of stickles.  For the leaves I used the cameo again with the folk art cut files (which are free btw - Claire is just too generous!) and I cut 5 of the largest leaves and stamped and embossed them with shimmer EP (WOW) and then I decided I needed a couple of larger leaves at the top so I resized the cut file a little and cut two and just covered the whole thing with shimmer to match the stamping on the small ones.

I used a banner die (Simon Says Stamps) with kraft card and stamped the Happy Birthday from what is probably my most used stamp set of all time from any company as it's just packed with useful sentiments - the Frame It set stamped in a soft chalky blue to match the background.  Finally finished by stamping MUM on a curve in grey using Wooden Heart Alphabet.

Mum doesn't know what a blog is, she doesn't own a computer, so there is no fear posting it before the day that she'll see it.  I know she's going to love it though as she adores flowers of any variety.

As it's definately on a floral theme, I'm also going to enter it to the current flowers theme over at Let's Craft and Create http://letscreatechallenges.blogspot.co.uk/2013/04/challenge-68-flowers.html and the Passion for Flowers challenge over at Allsorts Challenge http://allsortschallenge.blogspot.co.uk/2013/04/week-203-passion-for-flowers.html 

Wednesday, 10 April 2013

CASEing JJ


It's very late (or early in the morning depending on how you look at things) and I should be asleep but just before I was about to go to bed I spotted that the deadline for CASE study will close before I get up - so - I'm still up and playing.  I just loved this technique on JJ Bolton's brilliant card and really wanted to try it.  http://casestudychallenge.blogspot.com.au/2013/04/case-study-challenge-135.html


I used the new Folk Art Medallion stamp set from Waltzingmouse and stamped the floral element in orange soda and butter bar ink (HA) and then added a leaf in pistachio (Memento)  Rather than letters I chose to die cut a couple of butterflies (Clearly Besotted Dies) and I finished with a sentiment from Frame It (Waltzingmouse)

The orange, yellows and greens remind me or Narcissus so I'm also going to enter it into this week's Pink Elephant challenge which is all about Spring Colours http://thepinkelephantchallenge.blogspot.co.uk/2013/04/the-pink-elephant-challenge-tpe194.html

Night all.........


Thursday, 1 March 2012

Spring into Spring for St Luke's Charity Cards Challenge

It's the first of the month so time for our new challenge over at St Luke's Charity Cards Challenge and this month we're looking for you to get in the mood for spring with flowers, animals, colours or anything that makes you think of spring!

We have a brilliant prize package this month - a gorgeous set of floral stamps donated by Waltzingmouse stamps and the latest issue of PaperCrafts magazine.


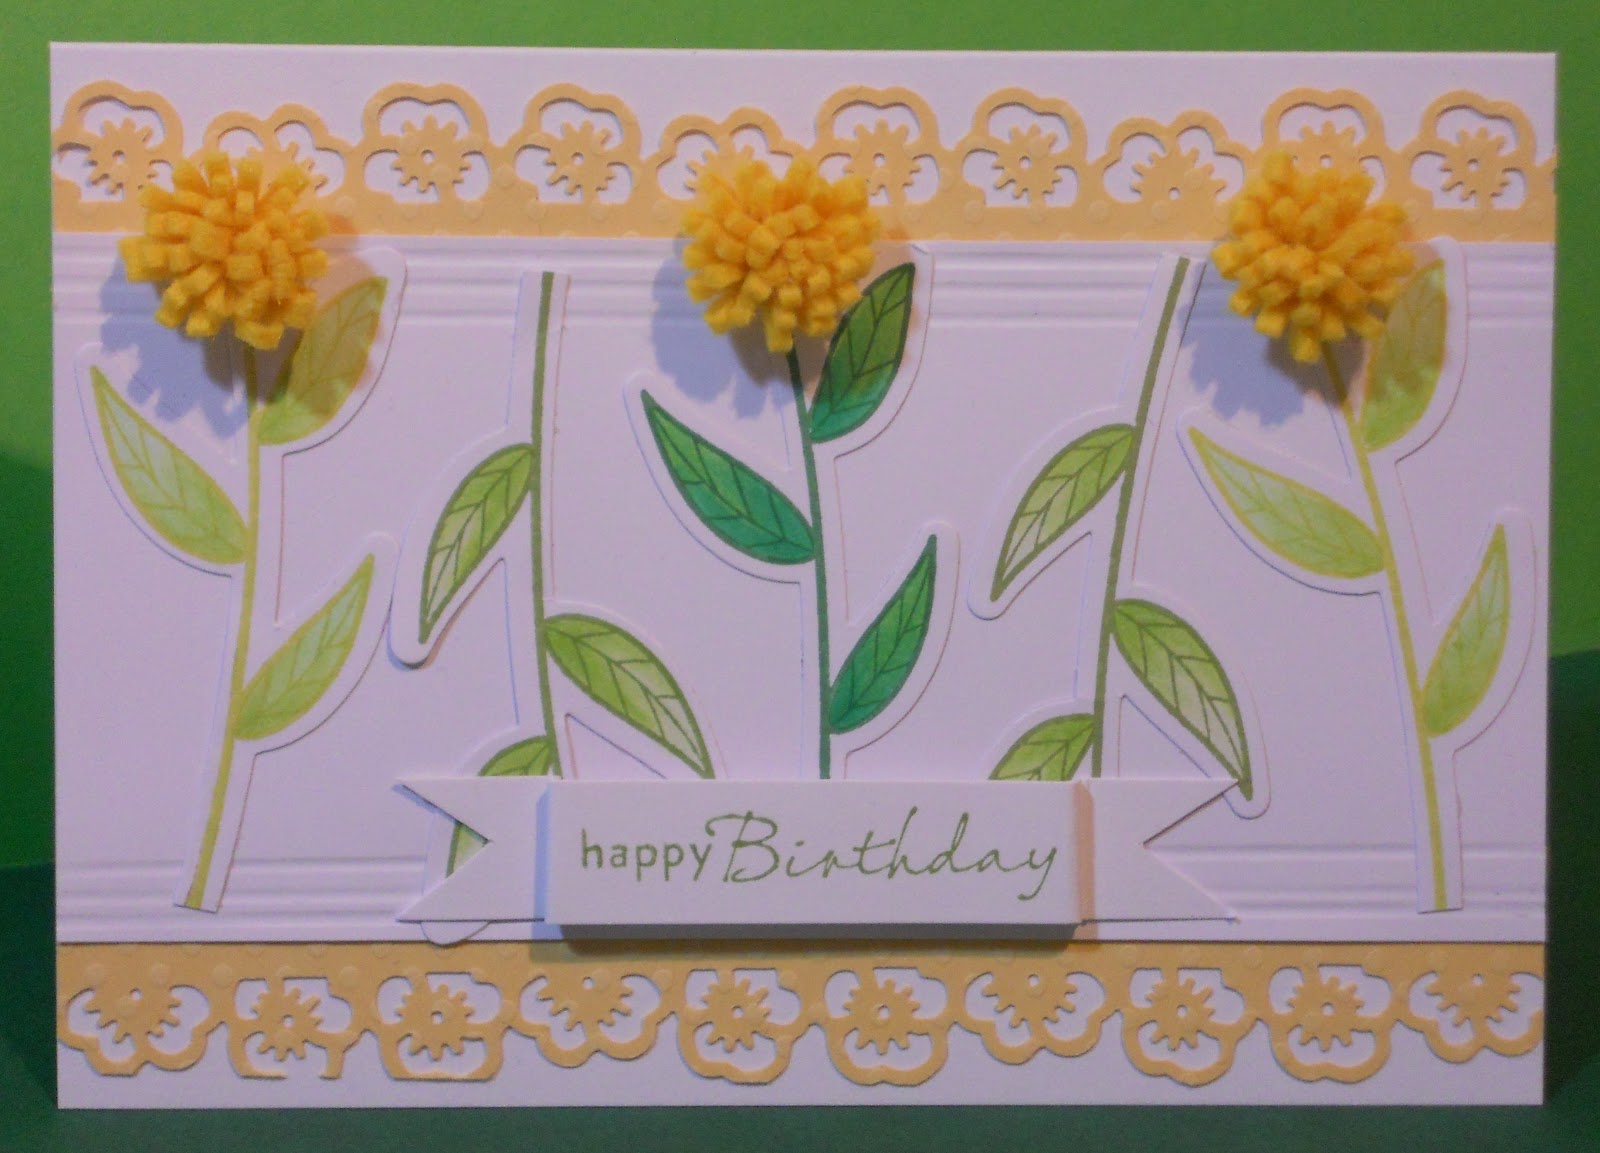
For my card I opted for flowers in spring greens and yellows using my favourite new medium of the moment - felt!  I love making felt flowers both with floral dies or just using old fashioned quilling techniques with a pair of sharp scissors which is what I've done here for my tiny yellow pom-poms flowers.


I started with a white base card, added a strip of white with some embossed line detail and I added a pansy border in yellow swiss dots on either side.  For the feature panel I came over all Morticia from the Adams Family and cut the flower heads of my stamp and die set (Sizzix/Hero Arts combo) and just used the stalks stamped in 3 shades of green ink and coloured with copics.  I arranged them top to tail to add interest and make them fill the panel and then added my felt flowers to the ones that were the right way up.  The flowers are simply made from a 3 cm strip of felt, folded in half lengthways and stuck with strong thin tape.  You then simply cut from the untaped end to where the line of tape starts at regular intervals to create your petals and then simply roll using a quilling tool (or toothpick) and seal the edge with more tape.  The sentiment is from Waltzingmouse's Frame It set.

You've got a whole month to play along with the challenge so do pop over to the blog to check out the challenge even if you only want to play for fun, there is NO obligation to donate your cards if you don't want to.

I'm also entering my card into the following challenges:

Cute Card Thursday - Signs of Spring
Aud Sentiments - Happy Birthday


Wednesday, 17 August 2011

Tea dance?

Excuse the poor pun, but today is the 17th which means it's waltz day on the Waltzingmouse Forum and this months theme is tea or coffee so tea and a waltz is a tea dance right?  If you want to know more about the waltz then this is the place to go http://waltzingmouse.blogspot.com/p/friends-blog-waltz.html


I stamped a frame with the frame-it set from Waltzingmouse (which is straight honest - its the photo that's wonky!) and added the appropriate sentiment from the same set into the frame all in a pearl crimson ink.  The stack of cups is made using lots of little snippets of dp traced through a papermania henbury lane stencil, cut out and stuck onto a piece of card I cut to the full stencil.  I added some lines with my fine liner and a little shading inside the cups with copics.  As I used lots of iddy-biddy bits of papers from my stash, I am also going to post this on Jule's Sunday Snippets challenge -http://jules-alwayswithaheart.blogspot.com/2011/08/jules-crafty-snippet-challenge-week-32.html - do I get extra points for the number of different snippets on one card Jules????

I'll be waltzing around the rest of the entries later today.

Tara (aka Craftilicious) x
Blogging tips