Showing posts with label Make the day special. Show all posts

Sunday, 9 February 2014

Bold Blooming Heart

It's one layer week at Less is More and it's anything goes so I decided to get smoochy for Valentine's Day with some Papersmooches blooms in a heart mask http://simplylessismoore.blogspot.co.uk/2014/02/one-layer-week-158.html.

I also decided to double up on challenges and enter this project to this week's CASology challenge where the cue word is "AND" with the romantic sentiment I opted for  http://casology.blogspot.co.uk/2014/02/week-81-and.html

It's also my project on my shop's blog this week  http://makethedayspecialcards.blogspot.co.uk/   as we have a large delivery of new Papersmooches goodies that will be in store in a couple of days ;-)


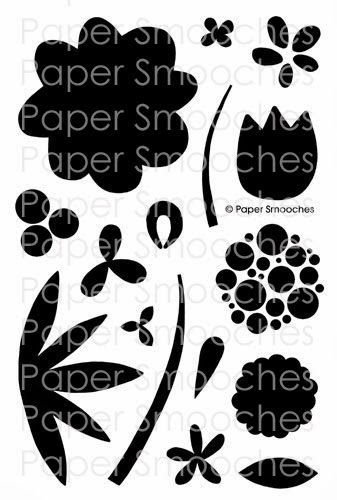
I die cut a heart mask from a sheet of scrap paper and stuck it over my card base and then stamped an arrangement of flowers and leaves from Papersmooches Bold Blooms through the mask onto the card (if you try this technique with large stamps like the leaf I used, a good tip is to not use an acrylic block - just put the stamp on the card and hold it in place with one hand but press it with the other - I find this gets you closer to the edge of the mask)

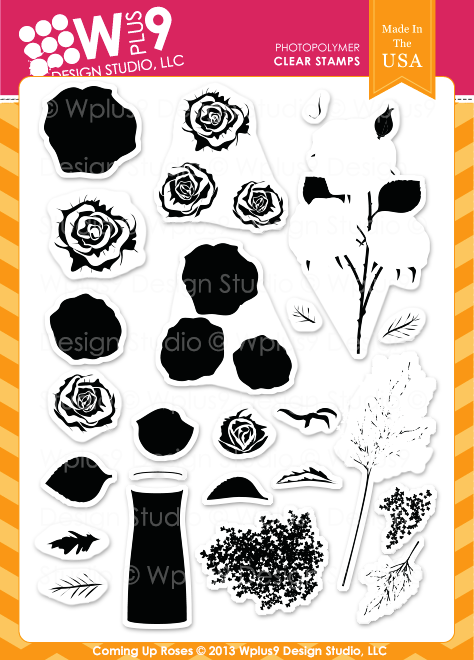
I stamped the sentiments from WPlus9's Valentine's Wishes over the top in Versafine black to make it stand out and then I traced around the die with a black glitter pen to tie it all together.

http://www.makethedayspecial.co.uk/shop.php#!/~/product/category=3351881&id=32781849http://www.makethedayspecial.co.uk/shop.php#!/~/product/category=2717738&id=18666079
http://www.makethedayspecial.co.uk/shop.php

Sunday, 2 February 2014

Coming Up Roses

Morning all and Happy Sunday.   Sunday's are my day on the Make the Day Special Stamp Store blog and today I have a card to share that I made for my Aunt whose birthday was this weekend and I went all out with some of my favourite sets from WPlus9.


I started with the lovely new Coming Up Roses set and stamped the multi-bloom spring directly on the base card in green adding the triple rose stamps in red with deep red for the top layer.  Next came a floral fest of stamping a die cutting using all the different blooms in the set in red, pink and yellow.  I love playing florist with these sets and I simply arranged the die cut and stamped blooms in place with pin flair gel for dimension around the vase which was stamped in blue with grey edges.

I used the Aunt stamp from Embroidered Bouquet Additions and embossed it in white on grey card and cut a little banner for over the vase.  The best wishes sentiment is from Fresh Cut Wreaths - I like to use sentiments on the front I can carry on into the middle so I added "on your birthday" inside.

I finished the card with a little DP (from my scrap box so no idea what its from sorry!) and my favourite twine - I love the thickness of all the Lawn Fawn twine but this triple set has my two "go to" colours of teal and grey so I use it a lot.  A simple line of it with a knot adds interest to the design without getting too fussy.

As this is very CAS which is very much my signature style I am going to enter it into this week's Birthday Week Comfort Zone Challenge at Wplus9's blog http://stampawaywithme.blogspot.co.uk/2014/02/birthday-celebration-week-1-comfort-zone.html

http://www.makethedayspecial.co.uk/shop.php#!/~/product/category=3351881&id=32781808http://www.makethedayspecial.co.uk/shop.php#!/~/product/category=3351881&id=32781823


http://www.makethedayspecial.co.uk/shop.php#!/~/product/category=3351881&id=32781821http://www.makethedayspecial.co.uk/shop.php#!/~/product/category=3351881&id=24370359http://www.makethedayspecial.co.uk/shop.php#!/~/product/category=2717767&id=12122472


Saturday, 1 February 2014

Rainbows

I'm super excited this morning as my favourite challenge blog turns 3 - can you believe we've been making CAS cards for 3 years?  When I think back to my first one layer card - oh my - how things have changed!   What is even more exciting for me is that I'm guesting on the challenge this week - eek - I told you today was exciting!!  The theme this week is rainbows and here's may take on it  http://simplylessismoore.blogspot.co.uk/


Isn't he just the smiliest leprechaun?   He's from Papersmooches "A Magical Spring" (yes I'm wishing away the rest of winter - had enough now!) which has some really useful images as well as fun sentiments.   I stamped him onto some watercolour card so I could colour him with my distress markers (are you fed up of me saying how much I love them - sorry I'll get bored of them soon I promise!) and I fussy cut him, the crock pot and coins.  I used another piece of watercolour paper to freehand my rainbow with the markers and then I stuck the images in place over the top.  The sentiment is from the same set.

The third exciting thing is that my new store is also this month's sponsor at Less is More so if you play along throughout February you could win a little spending spree in the Store ;-)

Sunday, 12 January 2014

Stellar Birthday

Sunday again which means only one thing - I'm bringing you inspiration on the Make the Day Special Stamp Store blog again today.


I decided to play with the lovely romantic inspiration photo over on the Mama Elephant January challenge but my screwed up brain saw romance and went for girly stars instead!


I stamped and embossed sentiments from Good Times and Say What first in silver and then with "vodka sparkle" embossing powders from WOW onto some pink cardstock.  Then I went to town with my die cutter and a couple of star shaped dies (MFT I think).   I used silver card, pink glitter and plain pink.  To get some very sparkly stars I embossed a couple of the silver ones with "bling bling" again from WOW.    Now I'm normally a CAS girl but clearly I didn't know when to stop with the stars and went for more is more this time!  I think it would be a suitable card for a tweenager though - they all love pink and bling right????

 http://www.mamaelephantblog.com/2014/01/me-challenge-january-2014.html


Sunday, 29 December 2013

Love is all you need

It's my day over on the Make the Day Special Stamp Store blog again today and my card was inspired by the current 2 week challenge at Less is More http://simplylessismoore.blogspot.co.uk/2013/12/week-151-merry-christmas-everyone.html which is to select any of their previous challenges to have another go at.

I decided to have another go at metallics and one other colour from a few weeks ago (Challenge 149) although my card would also fit challenge 24 - circles.

I wanted to use one my holiday sets to show that there is versatility beyond Christmas in some sets if you look for it so I decided to play with Strictly Sentiments 3 from WPlus9 and pair it with a matching styled sentiment from Mama Elephant's Smitten set.


Now whilst this set looks aimed squarely at Christmas with it's big sentiments - I was actually more interested in the striped circles that come with it and used those in 5 shades of pink to create a bubbly border down my card.  I then ignored the two Christmassy words and just focused on  LOVE and found another "LOVE" in Smitten which had the same style and another sentiment which paired with love perfectly.  I carefully cut the sentiment apart so I could rearrange the words in the famous song and just embossed all the words in silver for my metallic element of the challenge.


Sunday, 15 December 2013

Last minute gift making

Morning all, if your house is anything like mine at the moment then I'm sure that crafting is pretty low on the agenda of things that must get done.......

However, however much chaos is around me, I usually have a few last minute homemade gifts to make so need a few inexpensive and easy to make ideas up my sleeve and thought I'd share one with you today that you can make in under 5 minutes and costs just pennies which has to be a good thing right?


I bought these paper blocks for 99p from Waitrose a while ago and one block will actually make two of these little Christmas notelet sets.  I simply clamped them tight (an extra pair of hands is helpful here!) and then stamped the twigs and berries from Woodland Wreaths by Wplus9 and then added one of the greetings to the centre.  A little cellophane and a bit of ribbon and hey presto a perfect little gift for around 60p but looking like it cost a lot more!

I actually bought a lot of note holders in the John Lewis January sales that have been waiting to be turned into Christmas gifts so I added my stamped notes to them (and yes I really could have made them MONTHS ago instead of my usual last minute panic - will I ever learn????)


The wreath is from Make the Day Special and is currently out of stock but will be back in store soon, and if you don't have it, you could use just about any stamp set you have from a simple sentiment to some flowers or even fruit and vegetables - just clamp the edges of your paper tight as you stamp on them.


Sunday, 8 December 2013

Candlelight

It's my day to bring you inspiration over on the Make the Day Special blog again and I'm playing with one of the only remaining WPlus9 sets still in the store since everyone had a rush on them last week - Merry and Bright


I do love the multi-layer stamps that WPlus9 produce as they are such fun to play with and watch the images grow as you stamp them.  If you've never used them, I thought I'd show you how they work - for example the pine branches I've used on my card come in 3 parts so I've stamped them to show you how to layer them up.


For the rest of my card I used a mixture of the stamps and the matching dies, stamping the lantern twice, first on the card base and then again on vellum.  The pine branches went over the base image and then I used the die cut pine cones and holly leaves to cover up where they showed under the vellum - this allowed me to have the candle higher in the lantern but not have it floating in mid-air as you can't see the bottom of it.  I framed the scene in a die cut circle and stamped the sentiment onto a banner die cut with white embossing and layered it across the circle.

We're off to a food and drink fair at Donnington Park today for a little festive shopping so I expect to see lots of candle and pine arrangements just like this one!


Sunday, 1 December 2013

Merry Scraps

Sunday is here again so it's Make the Day Special Day again - is it just me or does it come around quicker the closer we get to Christmas???

I'm definitely in full on Christmas card mode at the moment, which means I've used a set that's come in and gone out of stock again - Peace, Joy, Love from Lawn Fawn - so I'm sorry if you haven't got it but I hope this is a bit of inspiration if you did manage to snag a set.


I decided to raid my scraps box as it's so full the drawer won't close again!   So I pulled out a selection of scraps in blues, greens and grey and trimmed them to different thicknesses to create my own striped paper.  Once happy with the arrangement they were glued down and the edges trimmed flush.  I then used 4 elements from the set - a single tree stamped in white at the bottom overlapping to create a border, the Be Merry border and fairy lights border were stamped and embossed and then the snowflake border stamped twice at the top.  All that was needed then was a little stickles in lights and hey presto - a card from scraps.

Sunday, 24 November 2013

Wiggle it!

Good morning all it's my day again over at Make the Day Special and I'm feeling in a masculine mood today - I think it must be all the Dr Who we were forced to enjoyed watching yesterday.....

So I've been playing with my favourite masculine stamp set Fish More and the companion die set.


I went for a faux embossing look by lining all the die cuts up across the card in rows and then added colour by stamping on top in a variety of blue and green inks.  Trimming off any die cuts that overhang the edges of the card.  For the sentiment I used a strip of vellum and embossed it with an opaque blue powder.  I also embossed the hook in silver before adding the fishing line both on and off the vellum with versafine.  There wasn't anywhere really to "hide" adhesive behind the vellum, but wackytac tape is pretty much invisible (I have a strip the whole way across) so that's a really useful addition to your craft stock if you want to use vellum and aren't handy with a sewing machine ;-)

Sunday, 10 November 2013

Christmas Peas

It's my day over on the Make the Day Special blog again today and I needed to search for a little inspiration for my make this week so I chose to play along with the "stripes" challenge at Paper Smooches Sparks and as I have this fabulous candy cane striped washi tape I immediately thought Christmas.  However as I don't have any Christmas Paper Smooches I had to think a little outside the box......


I thought the "Peas, Love, Happiness" sentiment in the Vegtastic set could lend itself to Christmas so I opted for Christmas Peas!  I stamped the peas on scraps of green card, added shading with copics and fussy cut.  I put a strip of washi down some white card, stamped the pea tendrills and stuck the pods in place before stamping the sentiment in versamark so it worked over the washi.  I stuck more washi onto a scrap of white card and trimmed a couple of thin strips from it.  All were then mounted onto a small red base card.

Peas out!


Sunday, 20 October 2013

The Elephants are here!

So it's my day to try and offer a little inspiration to you all over on the Make The Day Special blog and today I'm playing with Mama Elephant stamps as MtDS are the ONLY UK stockist of them and they've just landed in the shop this week!   I love these stamps, the designs are fresh and funky and they stamp beautifully!   The hardest job I had this week was deciding which of my new sets to make a card with but in the end the penguins won the toss......


Only I decided to not go traditionally Christmas with them - I thought they looked a little like they were pointing at each other in that way kids do when they're blaming each other so I paired them with a sentiment from Say What to give it a fun twist.

I stamped the stitched hill a few times in grey and then stood the penguins on the hill and coloured them with copics but now realise I put the yellow in the wrong place for an emperor penguin - I need to watch more David Attenborough programmes lol!   They're still cute though ;-)


Blogging tips