Saturday, 13 December 2014

Waltzingmouse Final Challenge

It's a sad day today, but as we've not managed to build up the number of players over at Waltzingmouse Fanatics, we've decided we have to close the challenge so this is our final one ever!   And thanks to Claire we have a great £20 voucher up for grabs and it's an ANYTHING WALTZINGMOUSE GOES challenge.

I decided on a fun Christmas card  using the new Jolly Old Elf set paired with Tis the Season.


I stamped him in red but then drew over some lines and details with black.  A washi tape border brings out the festive fun.

Do play along if you have any Waltzingmouse Stamps - it's your last chance!  http://waltzingmousefanaticschallenge.blogspot.com/2014/12/challenge-33-anything-goes-and-some-news.html

Saturday, 29 November 2014

200 Less is More Challenges

My favourite challenge site has reached a milestone today - 200 challenges and counting!  WOW that's an awful lot of commenting by founder LIMette Chrissie over the last 4 years - thanks so much - we all appreciate your hard work!

Of course I had to join in this week and the theme in honour of this milestone is celebration http://simplylessismoore.blogspot.co.uk/2014/11/200th-challenge.html

I went a bit out there and made a simple wedding card - they're a cause for celebration right?


I used the awesome new Sketchy Landmarks set from Altenew which is one of the sides of Westminster Abbey and I just love it - simple yet intricate.  I embossed it in white and then used distress markers scribbled on my acrylic block with a paint brush and water to get a soft water colour look.   I made a mitred corner mount using washi tape and mounted the stitched detail panel on top and finished with a sentiment from the same set.

Thanks for visiting.


Friday, 28 November 2014

Bunny Christmas

I get so little time to craft for fun at the minute but I was really taken by this sketch when I saw it at Retro Sketches tonight that I forced myself to make a quick card before the deadline closes in a few hours.  http://retrosketches.blogspot.co.uk/2014/11/retrosketches-142.html


Made with a SSS die, LF Snowday stamps and papers and some washi tape.


Saturday, 22 November 2014

Santa's coming to town

I have loads of stuff I SHOULD be doing today, but in the true spirit of the procrastinating crafter, I'm doing stuff for fun instead!  So I made a card for this week's "anything Christmassy" challenge at Less is More  http://simplylessismoore.blogspot.co.uk/2014/11/week-199.html


I just went really simple with the Joy to the World set from Avery Elle on a small square card.  Stamping the "santa" version of the globe in a nice bright red with the stark black santa silhoutte and sentiment really works for me.  The globe base had to be metal so I went for a cold silver.  I think I may be knocking up a few of these as I am badly behind on Christmas cards and these take about 30 seconds!

Right, I have an exciting gift project I need to finish for tomorrow - catch you later.

Saturday, 15 November 2014

PJs and Trees

Today is Waltzingmouse PJ party day and I've managed to combine their sketch challenge with this week's LIM challenge which is to feature more than one tree  http://simplylessismoore.blogspot.co.uk/2014/11/week-198-theme.html

Here's my take on the sketch which I've included below for reference.


I used the row of trees from Flurries and a bit of inking with a dauber over scraps of torn paper to get some hills to ground them on.  I wanted to tie into the "warm" in the sentiment so decided to add a large low yellow sun rising behind the hills.  I put my die cut panel onto a soft background of snow created using texture paste and a SSS stencil.


I didn't manage to do all the challenges this month but I did have a go at the Scandi Tag too.


I decided to do a sparkly red snowflake - not traditional but I think it works - particularly with this spikey number from the last release.  I added a little scani-ribbon and a simple sentiment along with a dashed border and hey-presto - a quick and easy gift tag.   I really love to wrap with plain coloured papers at Christmas and let my trimmings do the talking so these are going to look great on my red wrapping with lots of natural hemp twine.

It's just the day for a PJ party here - cold, grey and foggy.  What could be better than staying in and getting inky!

Tuesday, 11 November 2014

Savannah has a Star

I had a little birthday splurge on my favourite stamps for "colouring in" this weekend - I do soooo love an Uptown Girl from Stamping Bella.   It's a brand I don't sell myself though, so if you want them, then like me, head on over to my mate Elaine's fabulous store Quixotic Paperie and pick up a  lovely leggy lady (or 12 like I did!!!!)

I always like to try and play in my favourite weekly challenge - Less is More - and this week, they want us to feature a star on our one layer project - hope this one isn't too subtle ladies - she does have a star and it's even in the name of the stamp but it is a bit little!


I had such fun colouring Savannah in - and I love the idea of wearing a Christmas tree!  I stamped her on a kraft base card and used the stitched mat square dies from Lil' Inker Designs to create an embossed border and then traced the solid line in red to make it pop between the dashes.  I coloured her with Polychromos pencils - using just 3 shades of green to get some depth in the shadows and highlights on the tips.  I love using pencils on kraft - you can get such a grown up finish from a medium considered so childish!   I finished with one my favourite Christmas sentiment sets by Hero Arts.


Tuesday, 4 November 2014

Non-Traditional Christmas Colours

The challenge at Less is More this week is to make a Christmas card with no red or green http://simplylessismoore.blogspot.co.uk/2014/11/week-196-colour-challenge-non.html and Virginia's View challenge is "All About Metallics" http://virginiasviewchallenge.blogspot.co.uk/2014/11/virginias-view-challenge-9.html so I combined the two for my card over on the store blog this week.


I die cut an ornament from Paper Smooches from double-sided adhesive sheet and then covered it in 3 shades of microfine blue glitter to get a shaded effect (I used Blue Purple, Royal Blue and Bluebell - all of which can be found here) and then added the ornament topper in grey and silver.  A bauble needs somewhere to hang and for that I used my new Spring and Berries die from Elizabeth Craft Designs and cut it from silver card and I used the matching embossing folder to add interest to the background.  A simple die cut "joy" sentiment in matching silver was the perfect finishing touch.

It was the first time I'd tried the microfine glitters and I really love them - you can colour with glitter like you do with copics - the shades blend so well together and a little goes such a long way.  I am going to be glittering everything this Christmas!!!!


Saturday, 18 October 2014

Little Penguins

This weeks' Less is More challenge is to feature "little creatures" so I took it as a perfect excuse to use the new Mama Elephant penguin stamps I just got in store today before they sell out!  http://simplylessismoore.blogspot.co.uk/2014/10/week-194-little-creatures.html


I stamped 4 of them in a row, skating along until, like me on ice, they fall over and get very red in the face!   The sentiment and "ice lines" are from the companion set which I just love nearly as much as the little fellas themselves so I will be making my Christmas cards with these this year I think.

As it's a one layer card I used pencils to colour them in so it doesn't show on the inside and I left the sentiment open-ended so I can use this card for any reason by finishing it off inside with whatever I need at the time.

Thanks for stopping by.

Tuesday, 14 October 2014

Waltzingmouse PJ Party

It's party night - have you got your PJs on?  I'm ready, especially as I have Spandau Ballet on the TV too!

I managed 3 of the 4 challenges this month - I must admit the sketch stumped me a little - too many bits for my mainly CAS style so I passed.

Here's my card for the first challenge - Texture it - make texture without embossing folders.  It turns out mine was really hard to photograph - but hopefully you can make it out in the top right - I used 2 pieces of ric-rac ribbon and my embossing mat and ran it through the big-shot to see what would happen - irl it's really detailed (although the ribbon is now much flatter!) and I like the way it frames my scene.  The snowman is stamped on pearlised card and glued on with pinflair gel to get some nice round shaping to him and then his bits are paper-pieced with enamel dots for eyes etc.


The second challenge was "snow is falling" so I used one of the new snowflake dies and cut several from white glitter card and blue iridescent card to make a winter wreath with matching shimmering sentiment and a few sequin highlights.


Challenge 3 is old PJs - use any Christmas set other than the new ones.  I decided to make a really mini card - this one is just 3x3 inches as I had a lot of 3 inch scraps of this striped paper from another project.  I used one of my all time fave sentiments from Compliments of the Season 2 - I love the sheer elegance of this and how it can be the feature of a card (especially a mini one!)   Stamped in red on kraft and cut with a spellbinder label die - a few glitter accents, gold edging and gold washi tape - et voila mini card in 5 mins!


Have fun at the PJ party - I'll be back to see who else is playing later.

http://waltzingmouse.blogspot.co.uk/2014/10/welcome-to-october-pj-party.html

Saturday, 11 October 2014

One and Two

My favourite challenge of the month on my favourite challenge site is the one layer challenge - I used to be terrified of them but now I make mostly one layer cards so I love this challenge and this week all you have to do is have 2 of something on your card.   I've gone for 2 penguins and 1 santa so I hope that's ok!  http://simplylessismoore.blogspot.co.uk/2014/10/week-193-one-layer-card.html


I used North Pole from Avery Elle - you get 3 "sentiment hats" to put on Santa so it's a super fun set to play with but he looks so jolly it had to be Ho-Ho-Ho!   He dropped off a little pressie for my two penguins on his way to his sled.   It is all simply stamped and coloured with copics and glitter pens, and framed with a simple black line.


Thursday, 9 October 2014

Falling into Autumn

It's rare these days that I get to play along in challenges just for fun so I'm pleased I got time tonight to make a card which fits into 3!   The inky paws challenge at Newton's Nook and the Less is More challenge are both autumn colours and addicted to CAS is the codeword of stencil.


I used my favourite puddy-cat from Newton's Birthday Bash to be the focus of my card by extending the string with a black pen - colouring him with copics and adding glossy accents to the balloon before fussy cutting him out.   Having a ginger Tom seemed the obvious way for Autumn colours!


The background of arrows I thought was appropriate to add to the movement and was created with stencil paste coloured with acrylic paint and sprinkled with glitter.

The sentiment is from Avery Elle's Cake and Candles stamped in black and matted with a hand cut flag.

Here are the links to the challenges if you want to play along too.

http://www.newtonsnookblog.com/2014/09/inky-paws-challenge-14-fall-color.html

http://simplylessismoore.blogspot.co.uk/2014/10/week-192-colour-challenge.html

http://addictedtocas.blogspot.com.au/2014/10/challenge-49-stencil.html

Wednesday, 8 October 2014

Try a new technique

Over at Make the Day Special Stamp Store this month, we have a new challenge for you where we would like you to try a new technique, or if there is nothing new for you to try, for you to resurrect one you've not tried in a while.


I tried a couple of techniques - firstly - I had a play with nail varnish marbling - I have to say it didn't go well!   This was my third attempt - it was going to become a die cut snowflake but I gave up and found a new technique at this point!  I may give it another go as I hate to be defeated so I'll let you know....


So I switched to having a go at ombre embossing paste with stencils - I had never even used embossing paste before (I'm not great when it comes to anything messy!) so this was a bit of a challenge for me but I LOVE the results.


I made an ombre blue texture panel using texture paste mixed with acrylic paint and a stencil with added glitter for a super frosty feel.  I then added the penguin from Lawn Fawn, the north pole from Avery Elle and a die cut sentiment from Papersmooches.

I forgot to photograph the steps as I made the panel, so I did it again but this time went with shades of autumn.


Step 1 - fix your stencil to your card with washi/painters tape.  Put 3 dabs of paste on your craft at with 3 tonal shades of acrylic paint.
Step 2 - Mix the paint into the paste.
Step 3 - starting with the lightest shade of paste begin to spread it onto the stencil, taking care to go with the grain so it doesn't bleed underneath.   Don't leave a solid line so the blend looks more organic.
Step 4 - Take your medium shade and repeat step 3
Step 5 - Take your darkest shade and repeat step 3.  Scrape off excess and check the blend between the shades and adjust as required.
Step 6 - Remove the stencil (carefully or you could smudge it - I know cos I did!) and whilst the paste is still wet, sprinkle with super-fine glitter if using.    Allow to dry then cut to size and use on your project.

It's a great technique and I can't wait to give it another go.  The paste we have in store is super light and easy to work with.


Saturday, 4 October 2014

WCMD at Waltzingmosue Fanatics

We're making it super easy to play at Waltzingmouse Stamps this week - our challenge is anything goes in celebration of World Card Making Day.


I got my new goodies from Claire  this week so had to use them to play!  I went with the new Robin and pieced him using wood veneers and scraps of paper (his red heart is a gift tag which is super shiny!) and a little copic colouring.

I used the AMAZING new snowflake die to emboss a background to stand him on as I wanted something  on the card but for him to be the focus.  I am really pleased with how it came out.

Do pop over to the challenge and join in with us - anything Waltzingmouse goes this week! http://waltzingmousefanaticschallenge.blogspot.co.uk/2014/10/challenge-28-anything-goes-some-news.html
Saturday, 27 September 2014

Mostly Words

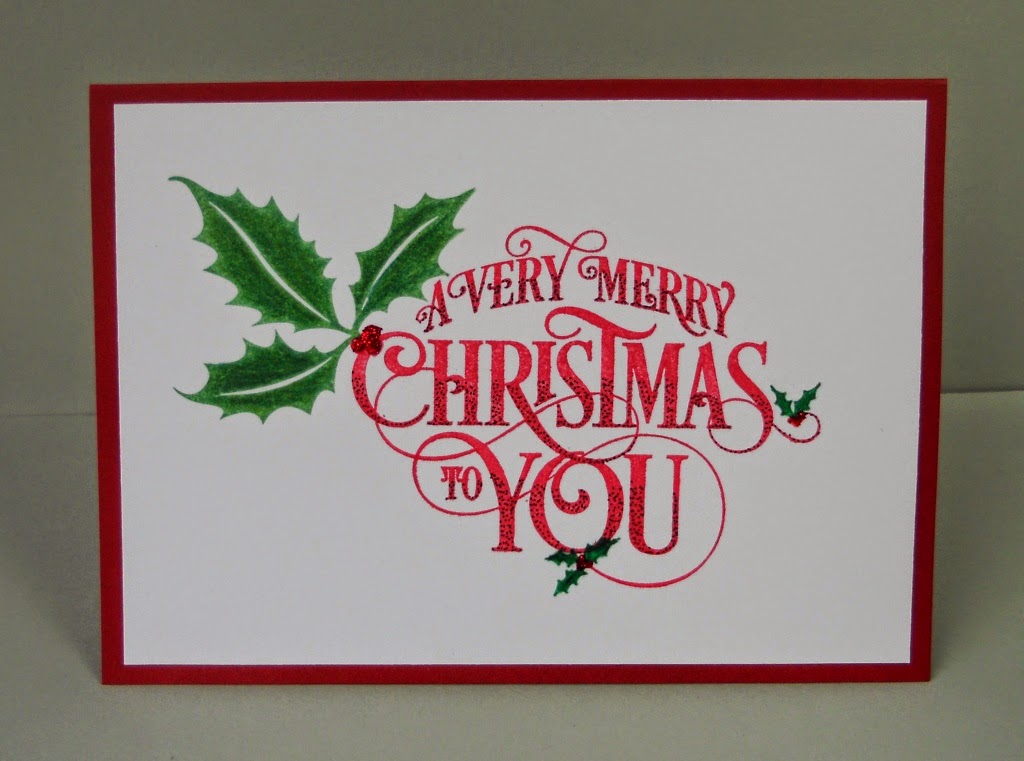
That's the challenge at Less is More this week - to have the sentiment be the star instead of the support act and I thought it would be great to use it for a Christmas card as I really should have made more by now!


I used the gorgeous new Season's Greetings die from Avery Elle, die cut three times and stacked on top of itself for dimension.  I chose to just frame it using a sheet of peel and stick wood veneer to add to the rustic feel of the font.  I just die cut a frame using two of the small stitched rectangle dies from Lawn Fawn - which means I have a bonus inner frame to play with later ;-)  The holly is cut from the same die and just mounted with pinflair gel to get shape and dimension with glossy accents on the berries.

Just need to knock up another 50 or so and I'll be set for December ;-)


Sunday, 14 September 2014

Waltzingmouse PJ Party

I do love a PJ party and it seems so long since the last one that I knew I had to make time to play.  Not sure if I'll get time to do all the challenge, but I did done one card this weekend.  If you're a fan like me - here's where you play along today  http://waltzingmouse.blogspot.co.uk/2014/09/welcome-to-september-pajama-party.html

Challenge One - Doodling


I must admit I shamelessly copied Claire's doodling as I couldn't fit much other than dots into the thin lines on this font, but I do like the interesting shading it gives.  I added a couple of doodled mini sprigs of holly to match the stamped one as my point of difference!

I love, Love, LOVE this new sentiment set - it will be featuring heavily on my Christmas cards this year....   It's called Tis the Season.

I loved it so much, that although I should have gone to bed as I have a big day at work tomorrow, I went ahead and made a card for the Bedtime Story Sketch too....

Challenge 4:


A simply stamped sentiment - that's what I love about them - they need so little else to make a card - cut with the Type It Die from Mama Elephant, mounted on a red panel with some textured ribbon on a kraft base.  Finished with a matching bow using Lil' Inker Designs Bow Die Mini.

I'll see if I get chance to play along in any of the other challenges before the day is out.

Saturday, 13 September 2014

It's 5 o'clock somewhere!

Very quick post for me today as I found 10 minutes to play with the current Less is more challenge - 
One Layer Beverages


I used the new Adult Beverages stamps from SSS - I know as a stamp shop owner I should use my own stuff, but I'm a crafter first and business woman second!  Also, this set just works for soooo many of my friends, it had to be done!

The card was simply done with masking and the drinks were coloured with polychromos pencils and blending solution.

Cheers!

Thursday, 28 August 2014

Simple Sketch

The LIM ladies have a really simple sketch for us to play with this week so I used it to make a card for my dog mad friend's birthday coming up this weekend.


I took a very simple approach - stamped the image (Stampin Up Hostess Set) and then watercoloured it with distress markers and a thin paintbrush.   I love this method of colouring at the moment - just scribble on an acrylic block, spritz and paint.  I added a thin green line to frame it before mounting it on a kraft base card.  The sentiment is stamped on a die cut (sorry no idea of the brand) but it has curly ends and was too long so I cropped it to fit the Wplus9 sentiment.


Saturday, 23 August 2014

Sketchy Christmas

Wow these weeks are whizzing by aren't they - can hardly believe its time for another challenge at Waltzingmouse Fanatics but we have a really cute sketch this fortnight so hope you'll join us if you have their products to play with.

I decided to take the sketch down the Christmas route and play with my yummy new papers and washi tape from My Minds Eye so picked a stamp to match the reindeer theme that runs through them.


I used two stamp sets - 2011 Holiday Ornaments (and the co-ordinating spellbinders die) and Say It Loud Winter Holiday.   I stamped the reindeer and dotted pattern onto the die cut kraft bauble in red and topped with the little topper stamp in black.  The paper I've used is double-sided so this card is made from one sheet and I stamped the sentiment directly onto the red striped one and added a little washi tape underneath to match the sketch before mounting the ornaments.


Saturday, 16 August 2014

Christmas Cat

The LIM theme was great for me this week, as I'd already got a card I finished last week but haven't had time to blog yet that fits the theme of animals perfectly!


I just watercoloured Newton lightly with distress pens and added some glossy accents and glitter to make the lights glimmer.  A little gold card and candy striped paper makes a quick and simple card that can be replicated with all the images in the Holiday Mischief set.


Sunday, 10 August 2014

Autumn Leaves

The challenge at Less is More this week is a one-layer card with foliage http://simplylessismoore.blogspot.co.uk/2014/08/one-layer-time-again.html


I went for Leafy Greens but chose to just use the large maple leaf and went autumnal with  pumpkin pie and raspberry jam inks from Hero Arts.   I just stamped each leaf on top of each other in the brown shade and then over-stamped with the red trying to get the ink to be a bit blotchy so the leaves look like they do in autumn when they fall off the trees.  I added a big bold sentiment from Mama Elephant's Splendid set once dry and dotted around some glitter and pearl dots to finish.


Saturday, 9 August 2014

Pink Poinsettias

It's challenge day at Waltzingmouse Fanatics and this fortnight we'd like you to get your markers out and colour an image on your project http://waltzingmousefanaticschallenge.blogspot.co.uk/2014/08/challenge-24-make-your-mark.html


I decided to make a start on Christmas as I've been wanting to replicate the pink poinsettias I found in a garden centre last year and fell in love with but which lasted about 3 days as they always do in my house!

I stamped the poinsettia from Big Bloom Poinsettia in charcoal grey (Hero Arts) and then coloured it in with distress markers using a little water to blend.


The sentiment is from Say It Loud Winter Holiday and I finished with a bright pink mat  and a little shimmer on the green centre to make it all pop.

We do hope you'll join us this challenge.

Thursday, 7 August 2014

Mojito Roses


I managed to join in this week's Less is More challenge which is based on this lovely shot of a mojito in a trendy jar  http://simplylessismoore.blogspot.co.uk/2014/08/week-183-colour-challenge.html


I used the gorgeous Painted Flowers from Altenew using 3 colours, yellow, green and grey.  Stamped the sentiment from Winnie & Walter also in Hero Arts Charcoal Grey and then picked out the bright blue with some dash lines and dots of stickles.   As the birthday word in the set is smaller, I decided to add focus to it with a yellow "shadow" highlight.


Saturday, 26 July 2014

Summer Relaxation

I've made a card today that is very much suited to the spell of hot weather we're having....


This is based on the colours from our new challenge today at Waltzingmouse Fanatics and the image and the weather just lead me to this card and I wish I was on a beach right now rather than in my hot back bedroom!   http://waltzingmousefanaticschallenge.blogspot.co.uk/2014/07/challenge-23-colours.html


This challenge gave me a chance to try out the new inks that we have in store at Make the Day Special Stamp Store - we got the full range of Hero Arts Shadow Inks in, which have been very hard to get hold of in the UK, and I have to say I love them.  I used Tide Pool, Soft Sand and Orange Soda for the background and added the beach hut and umbrella with Wet Cement.  The images and sentiment are all from My Island by Waltzingmouse stamps.

It's a 5 Saturday month which means my other favourite challenge - Less is More - is on an Anything Goes week, so I will be added this card to that challenge too.

Hope those of you who have Waltzingmouse Stamps will join us this fortnight as our numbers are very low just now so the challenge may have to close.....


Sunday, 20 July 2014

Singing in the Rain

This week's challenge at LIM is to be inspired by the song "Singing in the Rain" - a much easier challenge than last week's finger print one!   Although I have to say thanks as I got so many lovely comments on my card last week and I hated it - just goes to show that we are our own worst critics!   This is what I did this week:


I'm sorry but I have no idea where I got the image - it's an old red-rubber stamp in my "misc" file so probably something I picked up at a fair at some point (but at least I knew I had it as it was the first stamp I thought of when I saw this challenge!)    I stamped it onto a mini card and then used watercolour paints to colour it and to add the downpour of rain around them.   I didn't have exactly the sentiment I wanted so I decided to just hand write my own.   I have to say I'm much happier with this one than last weeks' effort!


Tuesday, 15 July 2014

Er - well - less said the better......

You could be fooled into thinking that todlers have taken over my blog today, but no, I am afraid this is all my own work - I can't actually believe I'm sharing it but here goes my entry to this week's Less is More challenge of "adapt a fingerprint on a one layer card"...........


Now some people in the gallery have done some amazing cards (can't believe Gay and Birgit used fingers!!!) - mine, well as the title says less said the better, but at least I had a go!   I made finger prints with distress inks in a very vaguely peakcock shape and then added the eyes and feathery bits with sakura gel pens.  Sentiment is Kraftin Kimmie.

Right - time to run away..............

Can we have something easier next week PLEASE?????


Friday, 11 July 2014

Horsey

One of my friends at work is very horsey - in fact she just qualified for HOYS (the Horse of the Year Show) last week, so when I see a cute horse stamp I HAVE to have it ready for her birthday card.  It's her birthday today so I'm safe to share the card now.  I've done the horse in the same colours as the one she qualified on.....


The horsey girl stamp is from MFT and the horseshoe die is a Joanna Sheen one.  Just coloured with copics and then finished with a SU sentiment and some (wobbly) dash lines!

I'm sure her 14th month old daughter will love it too as her favourite word, not surprisingly, is horsey!!!

Tuesday, 1 July 2014

CASE Histories


We're having a fun challenge this month at my store - we're calling it CASE History and want you to find a project from your first year of blogging and CASE it to see how far your style has come.  I started blogging in 2009 but if you look back, you'll see that there were no craft projects that year - I started off a food blogger but I knew I wanted to blog about crafts too so called my blog Craftilicious - crafty and delicious combined!   So I chose a project from 2010 - a wedding card I made in a box style and you can find the original post here.


I made this box card with the floral frame adhered to a fold in the middle so it had 3 layers and a 3D feel and it was this technique I decided to CASE and update on my new version and this is what came out of it!


I used a nestie to cut a couple of frames and then went full on die cut mode to create the sea scene.  The sailboat is adhered to the dotted paper on the base card, the rainbow and small cloud are stuck to the first frame and the larger cloud on the second frame.  This shot shows the dimension to full effect.


So you may think that the new card bears no resemblance whatsoever to the original - well it doesn't - but it was inspired by the 3D design of the original so it still counts as a CASE study - hope that encourages you to have a go and play along.

As my card is entirely made with die cuts - I am also going to enter it into Virginia's View challenge this month.

Sunday, 29 June 2014

Smoochy ribbons

I made a little card today which fits a couple of challenge this weekend - firstly Paper Smooches Sparks which is Anything Goes and Less is More which is Recycling.


I was inspired to make this card by the song "tie a yellow ribbon round the old oak tree" which came on the radio yesterday.  The yellow ribbon was salvaged from a box of chocolates so is my recycled item for the LIM theme this week.  The tree is from Paper Smooches Summer Groves and I coloured it with copics in a very basic pointillism style and fussy it cut it before tying my ribbon and foam mounting it.  The sentiment is also from Paper Smooches from the ever so useful Sentiment Sampler set.   I stood the little blue bird on the O so he's looking out for the person on the bus in the song.....


Saturday, 28 June 2014

Anything Waltzingmouse Goes!

Our new challenge at Waltzingmouse is anything goes this fortnight http://waltzingmousefanaticschallenge.blogspot.co.uk/2014/06/challenge-21-theme.html


Our friends are moving house today so I used the cottage home set to make them a new home card.  I just used the stamps to make a decoupaged card and coloured the layers with copics (you can't really see it clearly from this front on shot but the centre of the house stands off from the rear and the plants stand further forward still)  I added some embossed stones and a little ribbon for colour to finish.

Hope you'll find time to join us for this challenge - if you love Waltzingmouse stamps like Deborah and I do, please share your love with us.

Saturday, 21 June 2014

Back on the watercolour...

The theme at LIM this week is watercolouring - well I don't need much of an excuse to play with that technique again!


I decided to have another go at the watercolour technique Dawn from Wplus9 showed on their blog a few weeks ago - stamping with 2nd generation distress ink and then using a brush and water to soften the stamping for a watercoloured look.  So naturally I went to my favourite Fresh Cut Florals set but needed something to put them in.   I used Joanna Sheen's trug, but instead of die cutting it, I used the die to emboss the shape into the watercolour card stock.  I then stamped the flowers and leaves using Dawn's technique, and then used the distress inks with the brush to colour in the trug - the embossed lines "hold" the ink so it's easy to paint ;-)   A little more ink underneath to ground it and a sentiment from the set and a thin blue mat to pull out the berries and its finished.

I have wedding invites to finish today so I'd best get cracking!


Friday, 20 June 2014

Balloon paper

I needed a birthday card and wanted to use my new AE balloon dies again so I decided to take their current challenge as my inspiration and stamped my own designer paper with the little ones  http://aeiheartuchallenge.blogspot.co.uk/2014/06/aeiu-challenge-9diy-designer-paper.html


I tried a bold background first but didn't like it so I decided to go subtle instead and just used a single ink soft stone from Hero Arts and the 3 small balloon stamps to make my DP.  I think it turned out pretty well.  I make a card I added a blue and silver balloon using the matching dies and a blue and silver happy (Wplus9) and then I overstamped BIRTHDAY to finish.

Just in time to join the challenge I think.....


Sunday, 15 June 2014

Off the edge

Going off the edge is the challenge at Less is More this week and I got the perfect new set of stamps and dies in my store this weekend to make a card with that theme!

I used the large die to cut the top of the big balloon off the top of the card base and then simply stamped the rest overlapping each other.  Added the strings from the set and finished with a wink of stella for shimmer.

It's been an exciting week in the store - we've had 7 big boxes of new stock arrive, so if you want something to distract you from the football, then we have the following:

  • Lawn Fawn - latest release and restocks including the polka paper pad
  • Papersmooches - latest release and restocks
  • Neat and Tangled - SEQUINS (yeah!) and the latest release of stamps (the hope stamps is backordered)
  • Newton's Nook - the last couple of releases PLUS all the Christmas stamps that have been oos for ages!
  • Avery Elle - new release, restocks and storage panels!
  • Wplus9 - ALL the floral sets are back in stock as is hand letter hello!
  • and last but no means least - Lil Inkers - restocks where they had any left plus some more stuff I didn't get first time around.  They didn't have huge stocks but I will be ordering again soon.

Thanks for visiting

Tara
 

Wednesday, 11 June 2014

Nouveau Tiles

I really loved the new floral stamps at Clearly Besotted as soon as I saw them http://www.clearlybesottedstamps.com/products/nouveau-flowers and I knew I could do so much with them.  This is my second make for my SIL who's birthday is today and I was inspired to create a tile like the ones you see in fireplaces you can't afford!


I used one image and stamped it 4 times then selectively inked just the bud ad added that where the leaves joined.   The sentiment is made up from a WPlus9 set and a Mama Elephant set.

As their new challenge is Anything Goes then I'll link it up it http://www.stampingsharing.blogspot.co.uk/2014/06/clearly-besotted-challenge-12-anything.html

Blogging tips